There's no doubt it's fun to get together with friends and family and catch up on one another's lives during the holidays. But let's be honest. There's only so much to talk over before some members of the group — we're looking at the young ones — are likely to surreptitiously drift away or resort to phone-scrolling. When the oldies' conversation inevitably turns to their glory days or, worse yet, becomes contentious, you're going to need an off-ramp. Having something to keep everyone occupied and engaged offers the chance to not only enjoy casual chatter and laughs together, but also creates a tangible keepsake of the day. And you never know, the little project might someday become a "glory day" reminiscence for one of the young crafters at the table.
We enlisted two Spokane DIYers to come up with fun, just-challenging-enough crafts to create a fun and inexpensive crafty holiday event.
DIY Embroidery Hoop
Christmas Ornaments
By Ashley Jones
This holiday season, add a personal touch to your Christmas decor with these simple yet stylish
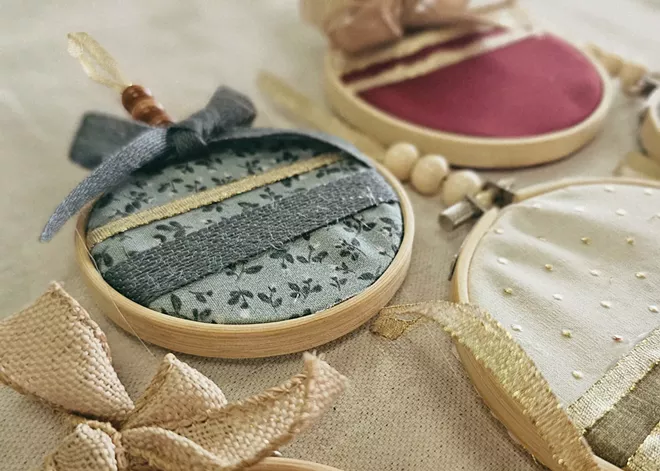
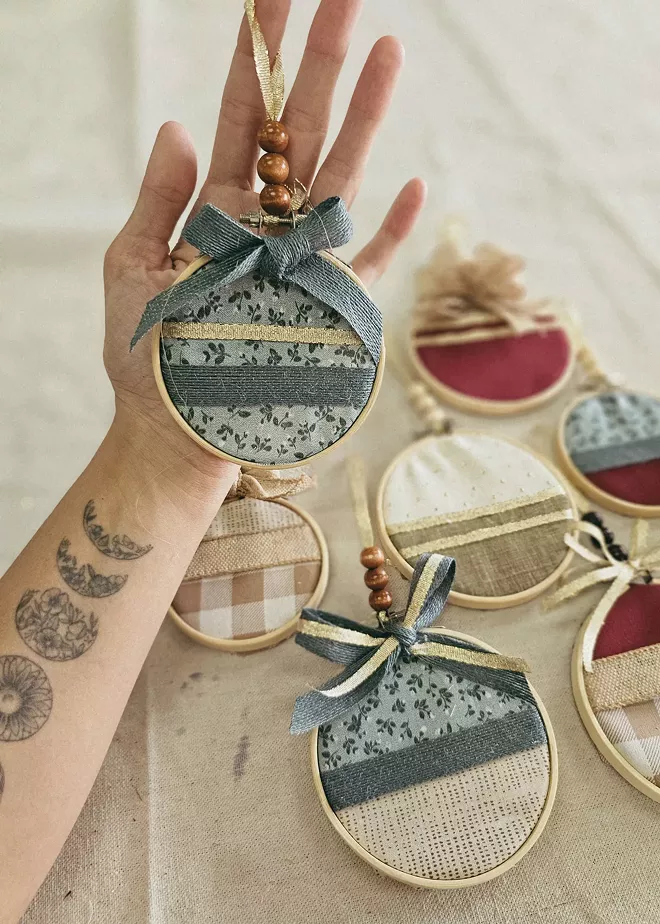
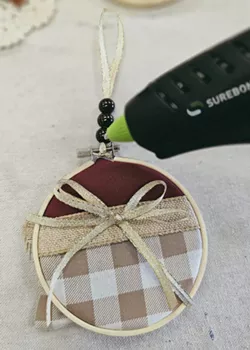
Embroidery Hoop Christmas Ornaments. These handcrafted ornaments are not only customizable to fit any theme but are incredibly easy to make, offering a warm, cozy aesthetic that you can switch out year after year. Whether you're crafting alone, creating with family or hosting a holiday crafting party, this project is perfect for any occasion.
Why I Love This Craft
I love how these ornaments combine a homemade feel with a polished finish. Their adaptability allows crafters to give them any style they like — whether they're into boho, vintage, farmhouse or something else entirely, providing an array of fabric squares means everyone will find something they like.
MATERIALS:
- Embroidery Hoops (3 or 4 inches): $2.50
- Fabric (Fat Quarters): $2 per color
- Ribbon (found at most fabric stores or even the dollar store!)
- Wood Beads: $3-5 for assorted colors
- Optional: A hot glue gun for easier assembly (but not required)
You can find all of these materials at major craft suppliers. Or even better, reuse old baby clothes, sweaters or tablecloths for a more personal touch!
STEP-BY-STEP INSTRUCTIONS:
Gather and Visualize
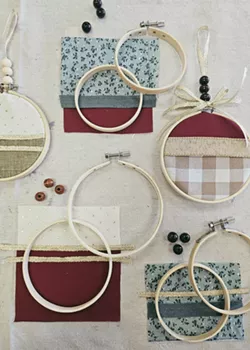
Lay out all your supplies. Arrange the fabrics, ribbons and beads in a mix to see what combinations you like best.
Cut Your Fabric
Trim the fabric strips to fit the size of your hoop. Remember, the fabric will be snug once the hoop is closed.
Preview the Layout
Place the fabric strips and ribbons in the order you plan to assemble them. Lay the embroidery hoop over them to get a feel for the finished look.
Optional Gluing
If you want a more secure hold, use a hot glue gun to attach the pieces before placing them in the hoop. Without glue, you can still wiggle the fabric into position to get everything just right.
Close the Hoop
Secure the fabric and ribbons by closing the embroidery hoop around them.
Create the Hanging Loop and Trim
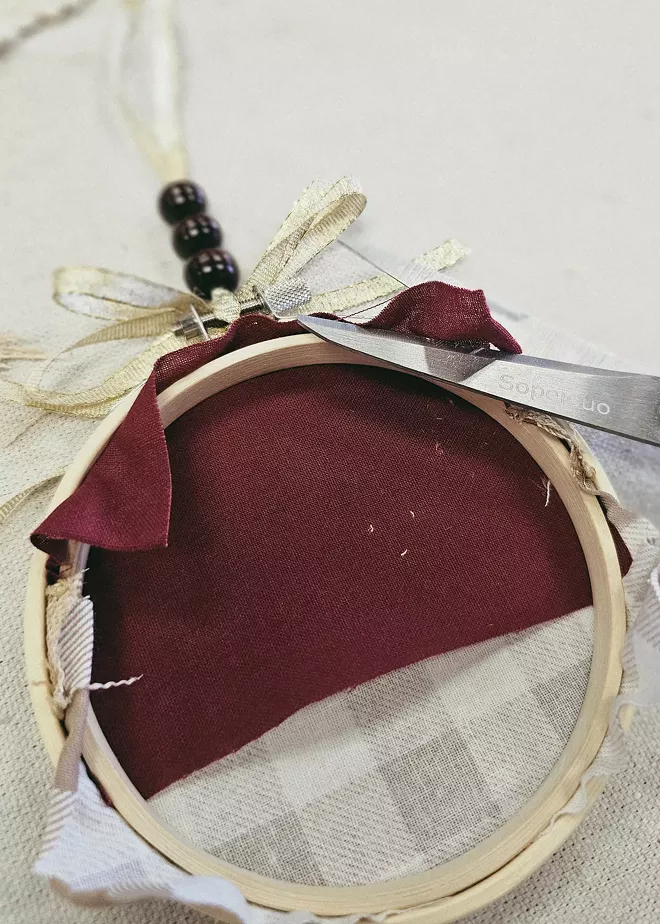
Fold a piece of ribbon in half, string some wood beads on it, and tie the ribbon around the hoop, leaving a loop at the top for hanging. Cutting off the excess fabric in the back is optional but provides a cleaner look.
Add Personal Details
Now for the fun part! Add bows, holiday stamps or little hanging doodads to make each ornament truly unique.
Display and Enjoy
Voila! Your handcrafted ornament is complete and ready to hang.
Ashley Jones is the owner of Covered With Art in Spokane Valley.
Origami Garland
By Mieko Takeshita
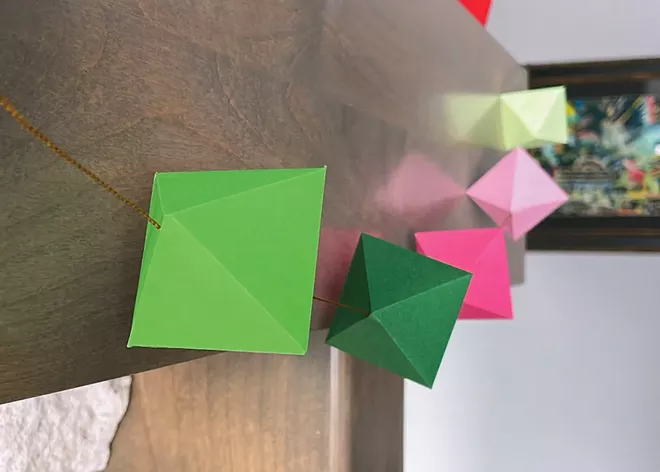
Festive garlands are a quick way to get into the holiday spirit, but how about mixing up the standard look with something a bit more creative? This tutorial will show you how to quickly construct a handcrafted Origami Garland for an unconventional but eye-catching decoration you can hang immediately. Each crafter can make their own garland, or each guest could craft one or more origami diamonds to string together for a collab garland.
Difficulty: Easy to moderate
SUPPLIES
- 14 sheets of origami paper in colors of your choice (I am using shades of green and pink)
- 8 feet of kraft baker's twine (I am using gold)
- Scissors
- 12-inch ruler
- Mechanical pencil
- Quick dry tacky glue
- Printer
- Bone scorer (optional)
TIPS BEFORE YOU START
- Scoring the paper where you need to fold will greatly help you fold straight, crisp lines — and save you some headache!
- Tacky glue is great for this project because it stays liquid long enough to line up your edges but dries quickly so you can build fast.
PREPARE THE TWINE
Measure and cut 8 feet (96 inches) of twine. Tie a small loop at each end, where you'll eventually hang your garland.
MAKE THE ORIGAMI DIAMONDS
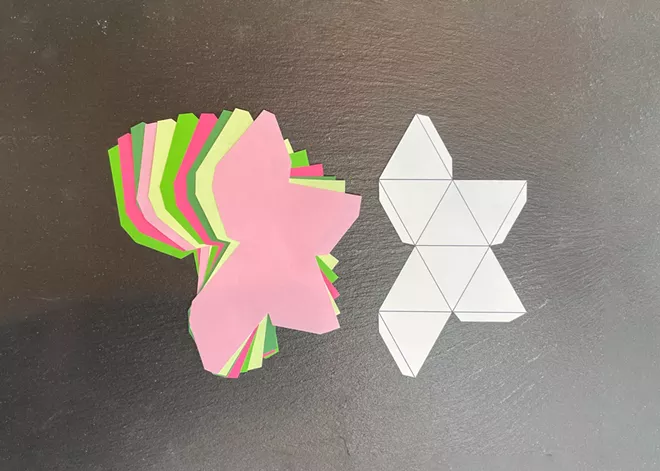
Get the template: Scan the QR code to download the origami template, print it, then cut around the outside edge. Note: Be sure to print at "actual size."
Cut: On each sheet of origami paper, trace the edge of the template, then cut each of them out.
Score paper: During this step, you will add soft creases to your cutouts to help you fold the paper in a straight line! Analyze the lines on the template; this is where you will be folding the paper. Now, look at your cutout shape. Line up the ruler where a fold should be. Using your bone scorer (or mechanical pencil with the graphite retracted), score the paper by running along the ruler's edge to create a crease in the paper. Finish scoring the paper according to the template.
Fold paper: Carefully fold a hard crease along each score. At this point, you should be able to see how the diamond shape will come together, with the tabs on the inside.
ASSEMBLE & GLUE
Glue the top and bottom of the diamond: Draw a thin line of glue on any tab (remember, a little bit of glue goes a long way). Take the neighboring edge, place it on top of the tab, and line up the edges. Lightly press the paper together to flatten the glue. Do the same on the other half of the diamond. You should end up with glued "top" and "bottom" halves, like a clam shell.
Glue the diamond onto twine: Take the twine and measure approximately 3.25 inches from the loop. This is where you'll glue your first diamond. Inlay the twine in the diamond so that it stretches diagonally across the middle. Add glue to the three remaining tabs and close the diamond. Lightly press all three edges to get the glue to stick.
Finish: Measure another 3.25 inches of twine, then glue your next diamond until you've filled the twine.
Wherever you decide to hang your garland, it will add a burst of color and distinctive holiday cheer. Happy crafting!
Mieko Takeshita is a creative director by day and sole owner and crafter of Spokane's Hanami Paper Co., where she makes paper flowers and inspired origami. Find her at @hanamipaperco on Etsy, Instagram and Facebook.

