
Last week, our cover section featured some of the most gorgeous local
After all, as any chef knows, the first way we taste a dish is with our eyes. (There's a reason Sam I Am had so much trouble getting his buddy to try green eggs and ham.) But these, of course, were meals prepared and designed by professional chefs and photographed by our professional photographer. What about all us Pinterest Moms and frazzled mistake-prone amateur cooks out there?
Do we stand a chance of showcasing our own home-cooked meals with as much beauty? Are our creations worthy of both likes and favs?
I say I am. And I say you are too. Social media, understandably, gets a bad rap for pushing us toward inauthenticity — we post our proudest moments, or swankiest vacations, or prettiest selfies. It isn't truly us.
But that's the strength of it too. By encouraging us to pretend to be more impressive than we actually are, it sparks us to up our ambitions. To
I'm the sort of person who can live — and has lived — months on frozen turkey burgers, Grocery Outlet pizza, Strawberries & Cream Quaker Instant Oatmeal and PastaRoni.
But "slobby bachelor" is not the #personalbrand I'm trying to portray on social media. So every once in a while I make fancy dishes and then try to figure out the best way to photograph them.
I also sat down with Young Kwak, our award-winning staff photographer who took the pictures for our "prettiest plates"
Sometimes he uses fancy lights and expensive cameras, but a lot of times, he says, a decent smartphone is more than enough to take a great photo if you know what you're doing.
So how can you become better at amateur food photography?
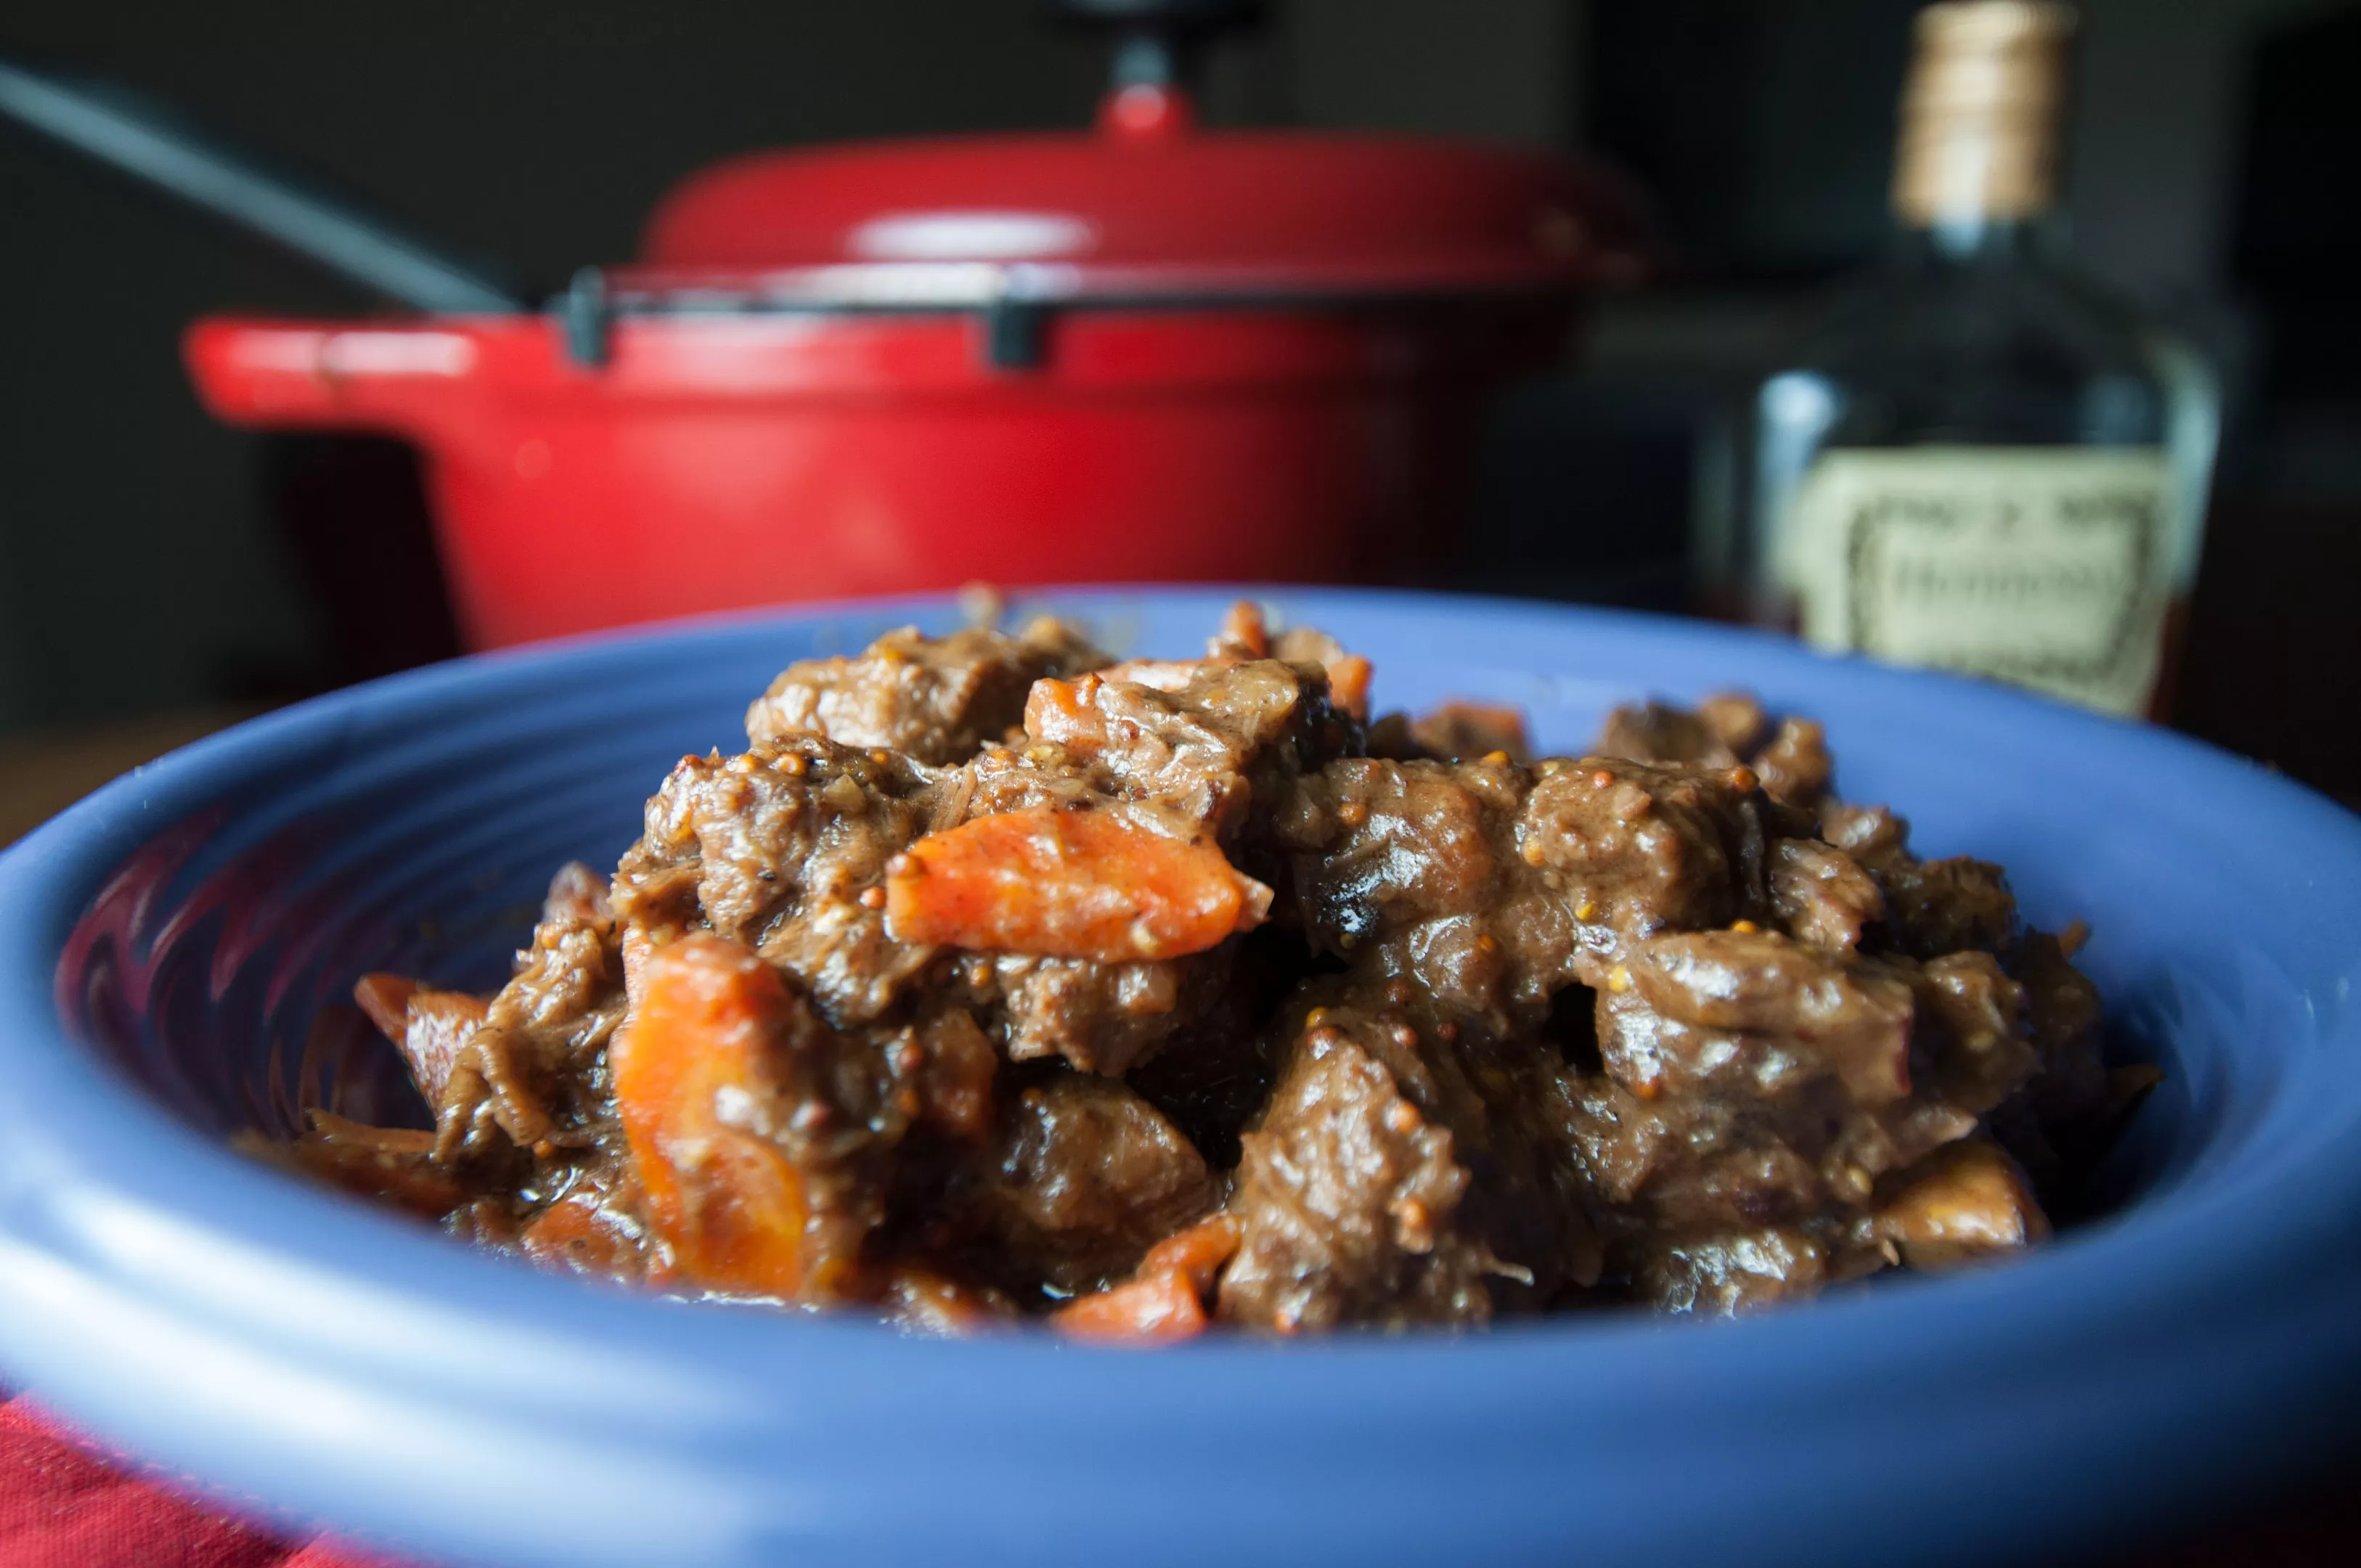
First, let's look at one of my culinary masterpieces from 2013:
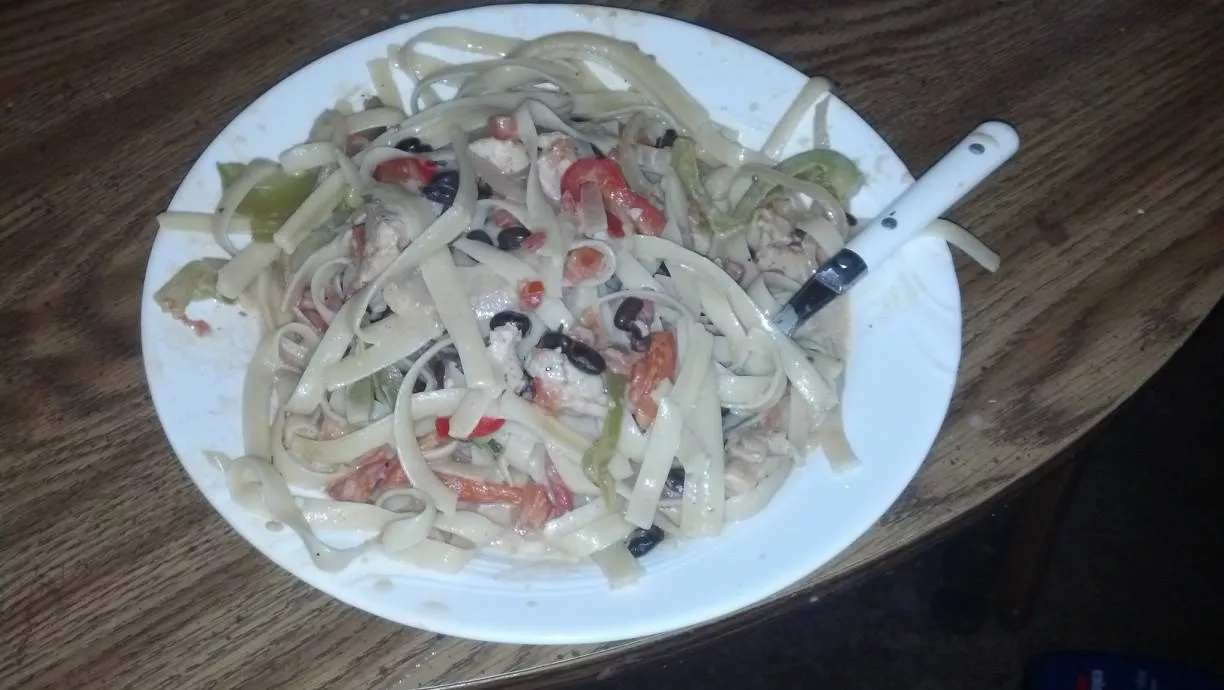
I have actually removed this photo entirely from my Facebook page — like a picture of an ex after the relationship ended badly — because the photo was so embarrassing.
I showed this picture to Kwak, and he laughed.
It takes a fairly a delicious Cajun chicken pasta dish and turns it into something that looks like it belongs in the cafeteria of a Russian prison. Offer the dish to Oliver Twist and he'd be like, "Nah, man, I'm good."
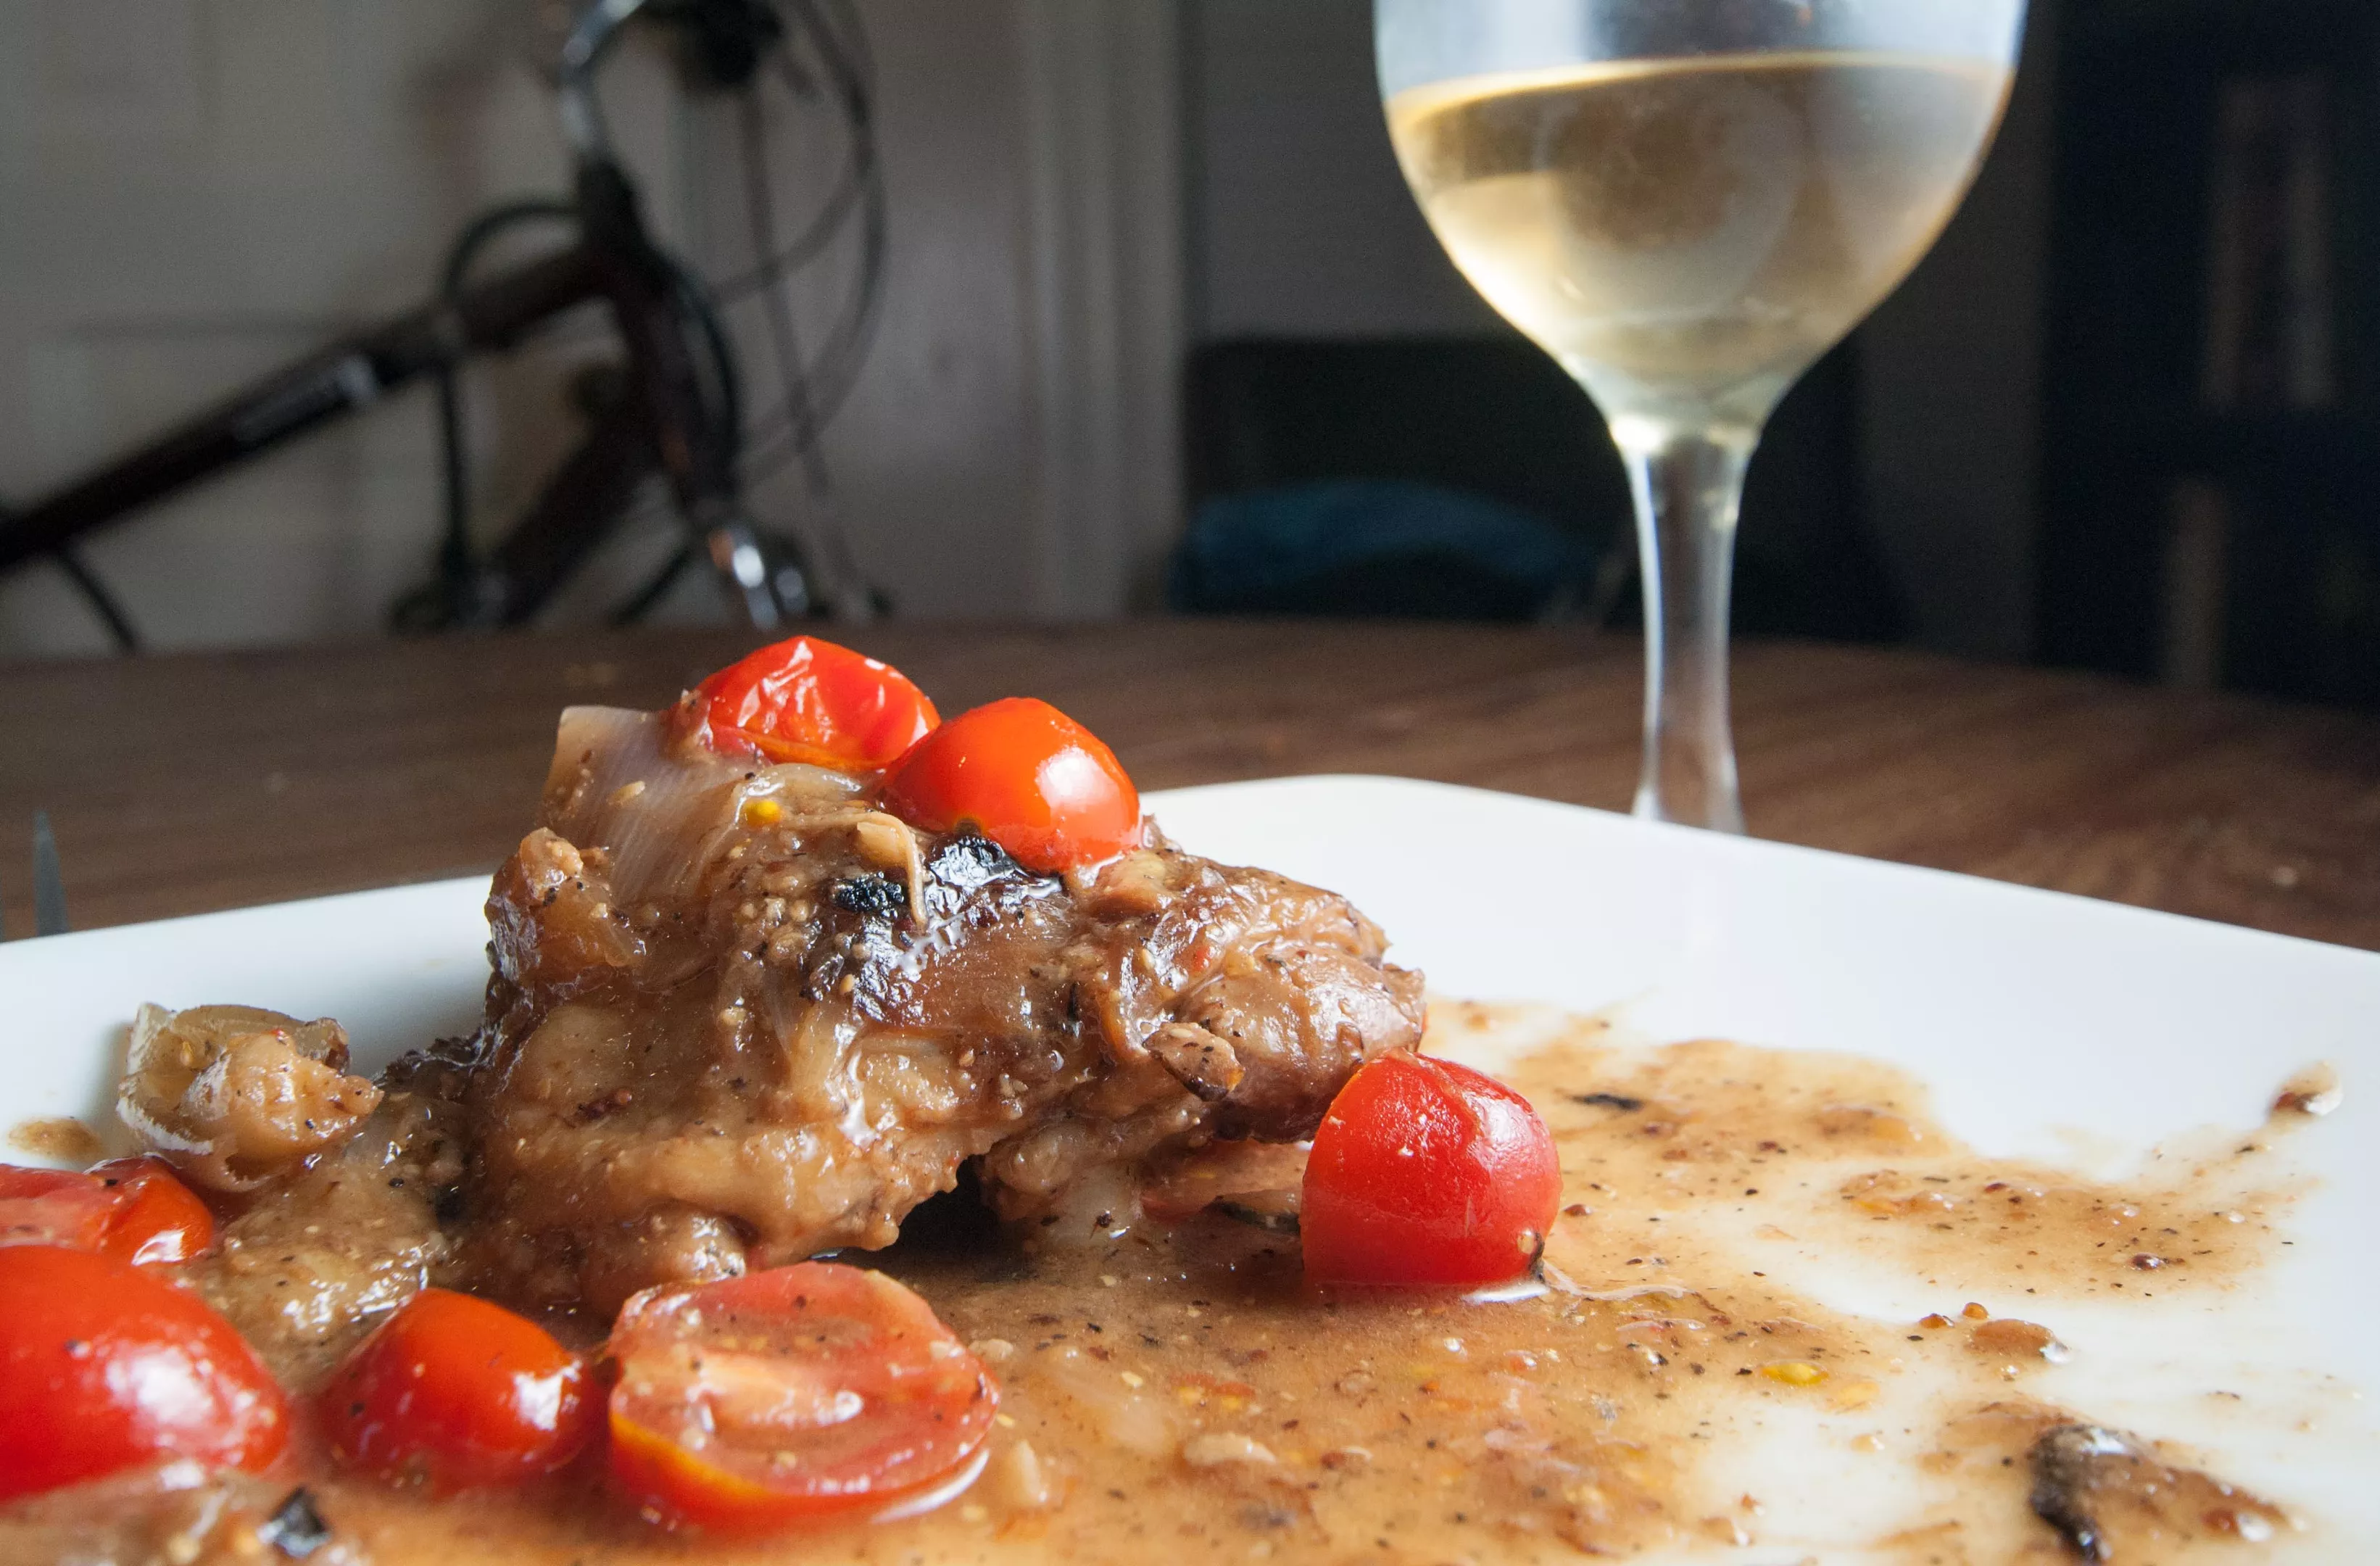
Now here's a picture from a meal I made last month:
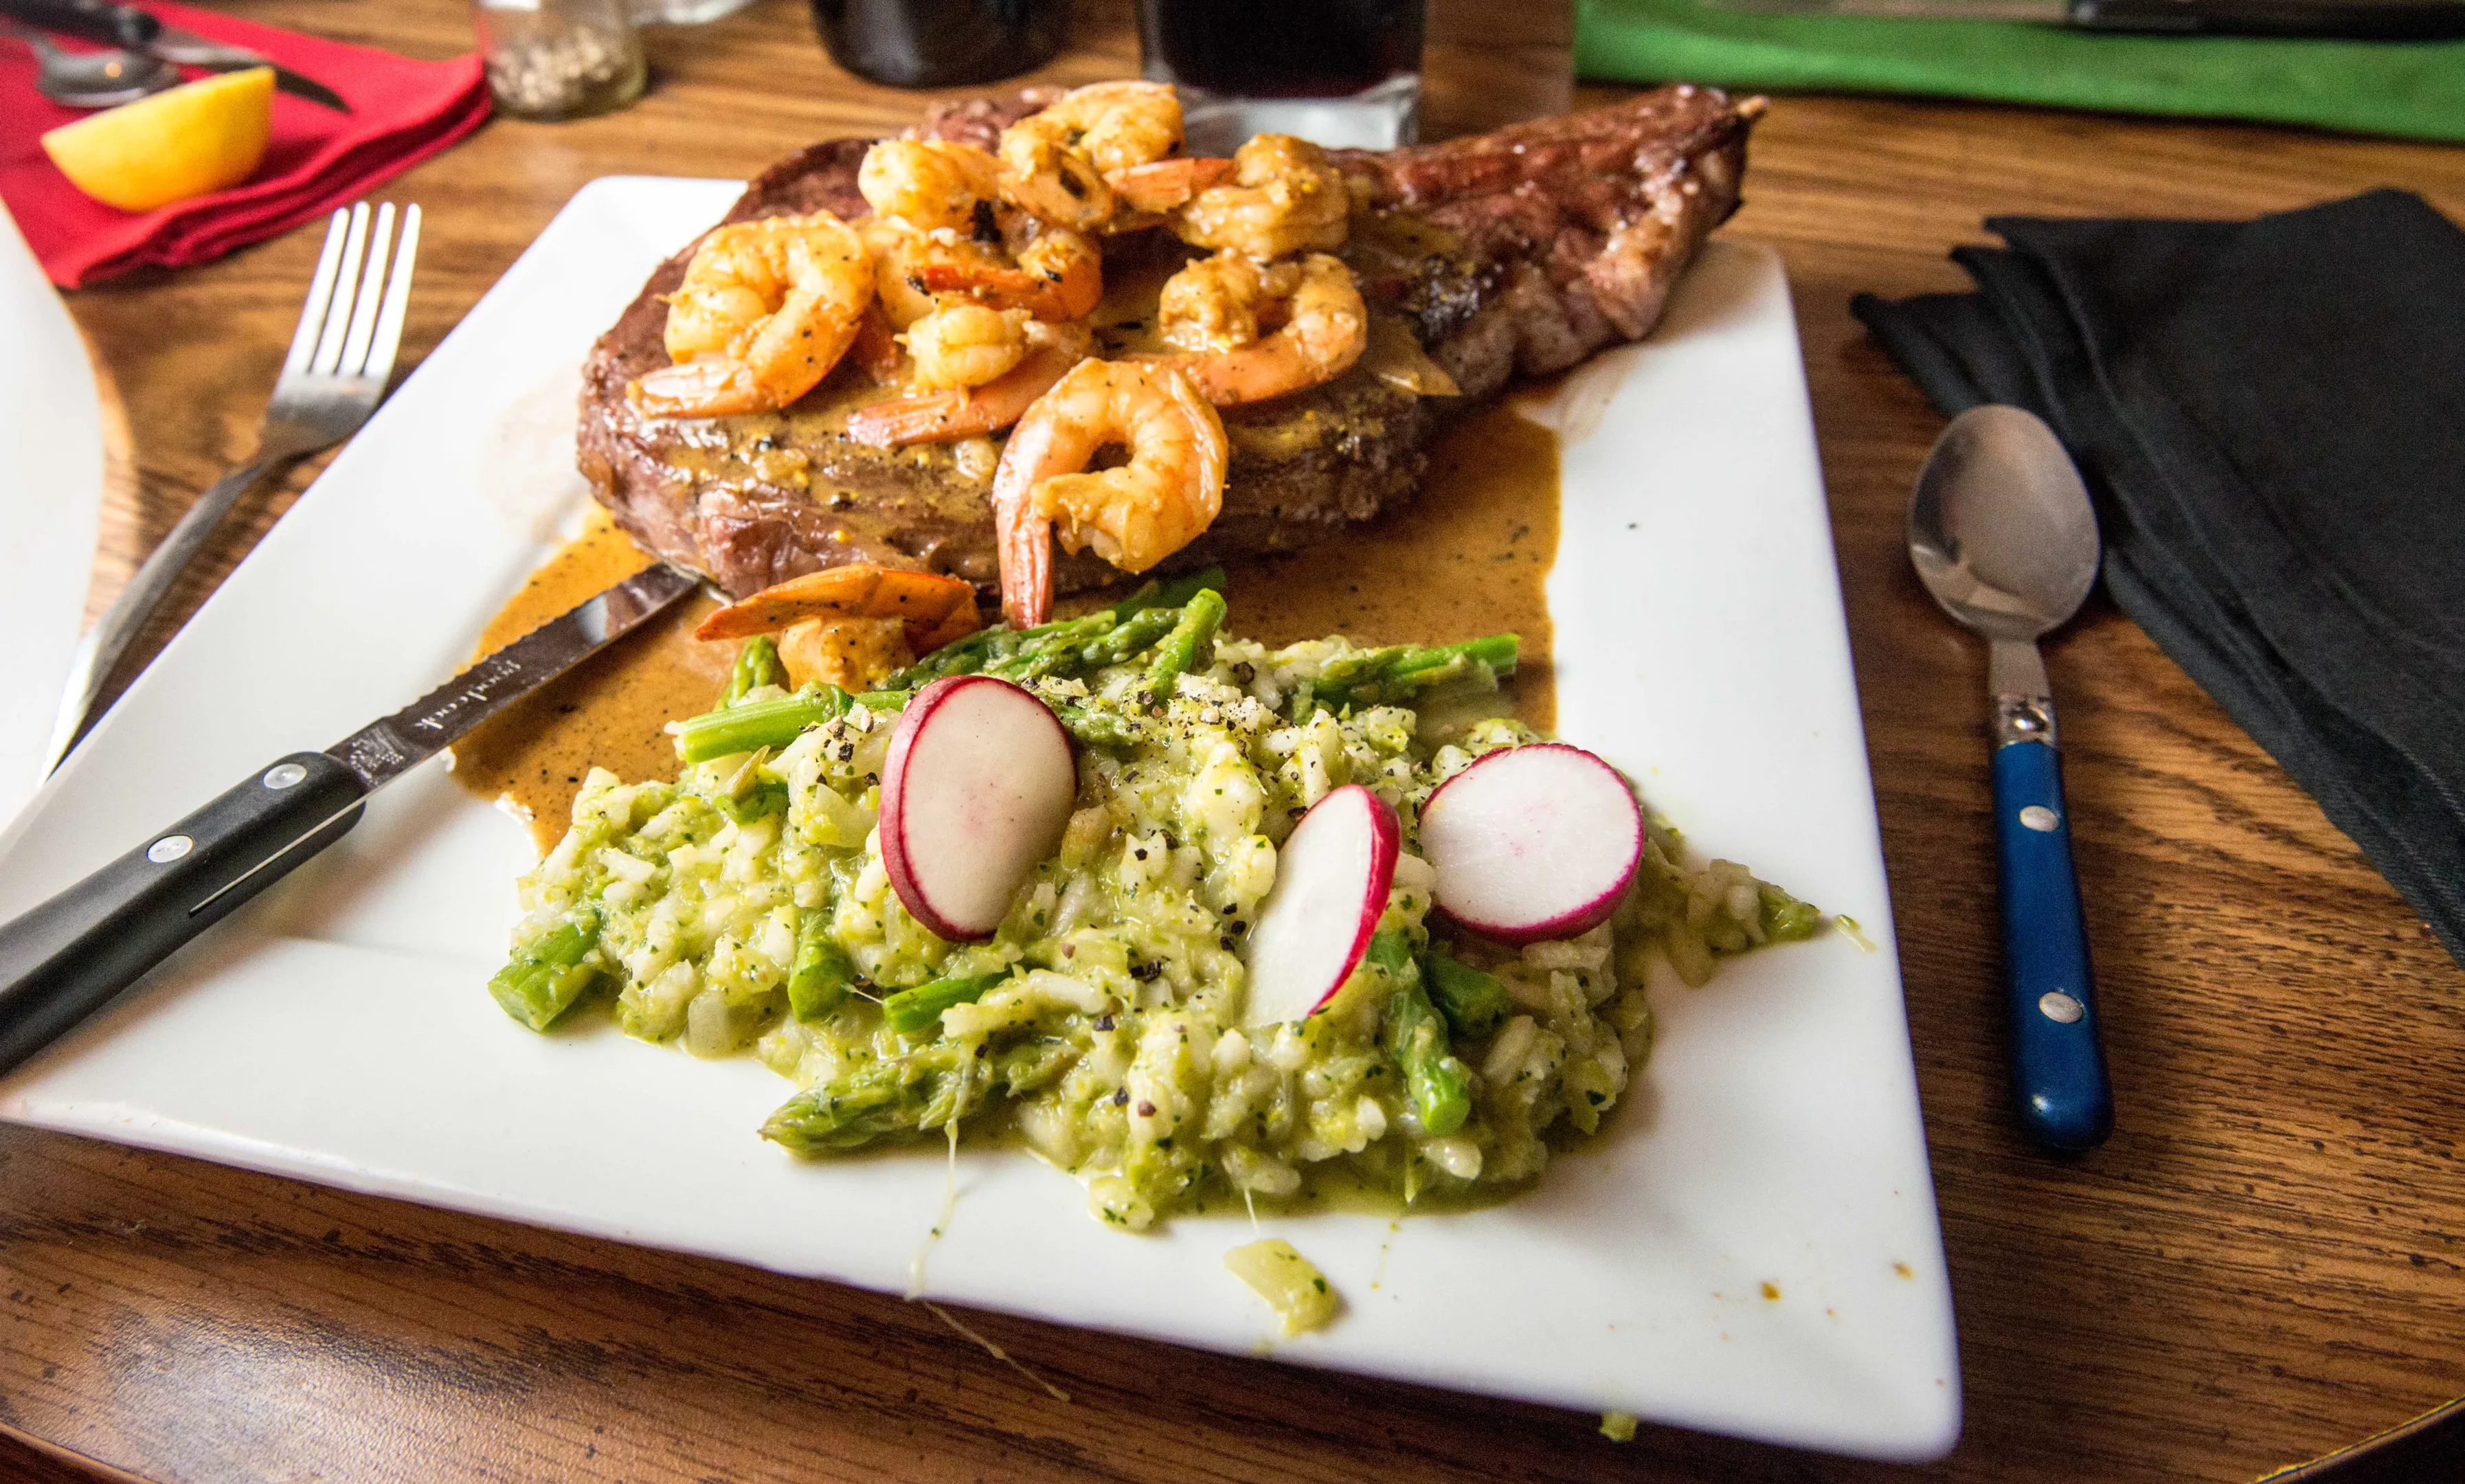
That's the same table! But the food on it looks a lot tastier. Some of that has to do with the culinary choices (a bit more expensive, a bit more pretentious).
Light 'em up (usually from the side)
The biggest problem with that Cajun chicken photo? Lighting. High school gym class-quality fluorescents tend to make your meals look as tasty as high-school gym shorts. Your typical flash usually results in unappetizing foods shots too.
By contrast? Great light can turn food into artwork. Kwak suggests actually looking at artwork for inspiration.
"Vermeer's paintings are a good place to start," Kwak says. "Look at the food that’s on the table."
One key? Vermeer typically lights his foods from the side, instead of from above or head-on.
"I would avoid using the light that’s coming from the same direction you’re looking," Kwak says.
Lighting from the side gives most meals interesting shadows and textures and depths, without obscuring the details. There are exceptions, of course: If you have a soup in a bowl, you might want to light it from the top and shoot it from above.
I used to use a desk lamp to light up the photos, and then would throw the RAW file into Photoshop Elements to compensate for the orange-y color. Recently, I got a fancy photo light.
But Kwak says there's a much easier method: Use natural light. Up in the northern hemisphere, light from north-facing windows will eliminate harsh angles and problematic shadows.
But even if you're out at a dimly lit restaurant, you can use a little bit of a lighting trick, Kwak says. Ask your dining partner to use their flashlight app on their smartphone to light up the food from the side while you snap a picture from the front.
Explore blurred lines
Narrow your depth-of-field too much, and the most important parts of your dish can look gauzy and blurry. With a depth-of-field too wide, your photos can turn dark, grainy or pick a motion blur if your camera's not on a tripod.
Or, as is the case with the photo above, you can end up inadvertently highlighting your bike in the background.
In many of the best food photos, it's almost like the world outside the dish barely exists, while the most interesting parts of the meal are in sharp focus.
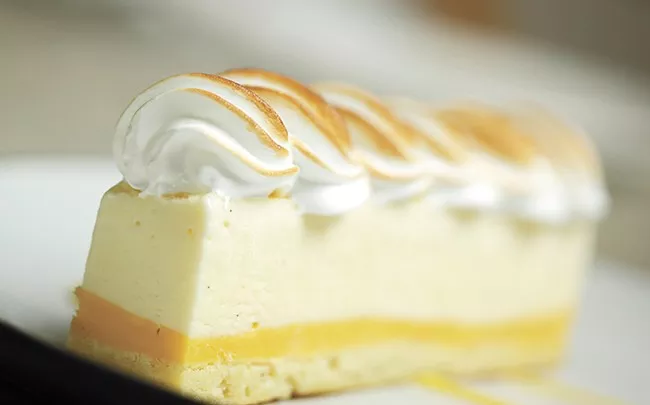
That doesn't always mean everything has to be in focus, however: Look at this photo Kwak took of the baked Alaska from Luna. The fade-to-blur of the depth of field makes the pastry look softer — almost angelic.
Unfortunately, for an amateur like me, there's a lot of nuance to depth-of-field I haven't figured out yet. It has to do not only with your camera settings, but with the length of your lens and with how close you are to your subject.
The solution? Just take a bunch of shots from a bunch of angles. Adjust the aperture on your camera frequently. Go in close for the fine detail and maximum blur. Pull back and don't be afraid to crop out extraneous detail. Then pick the best one.
Drizzle, don't glop
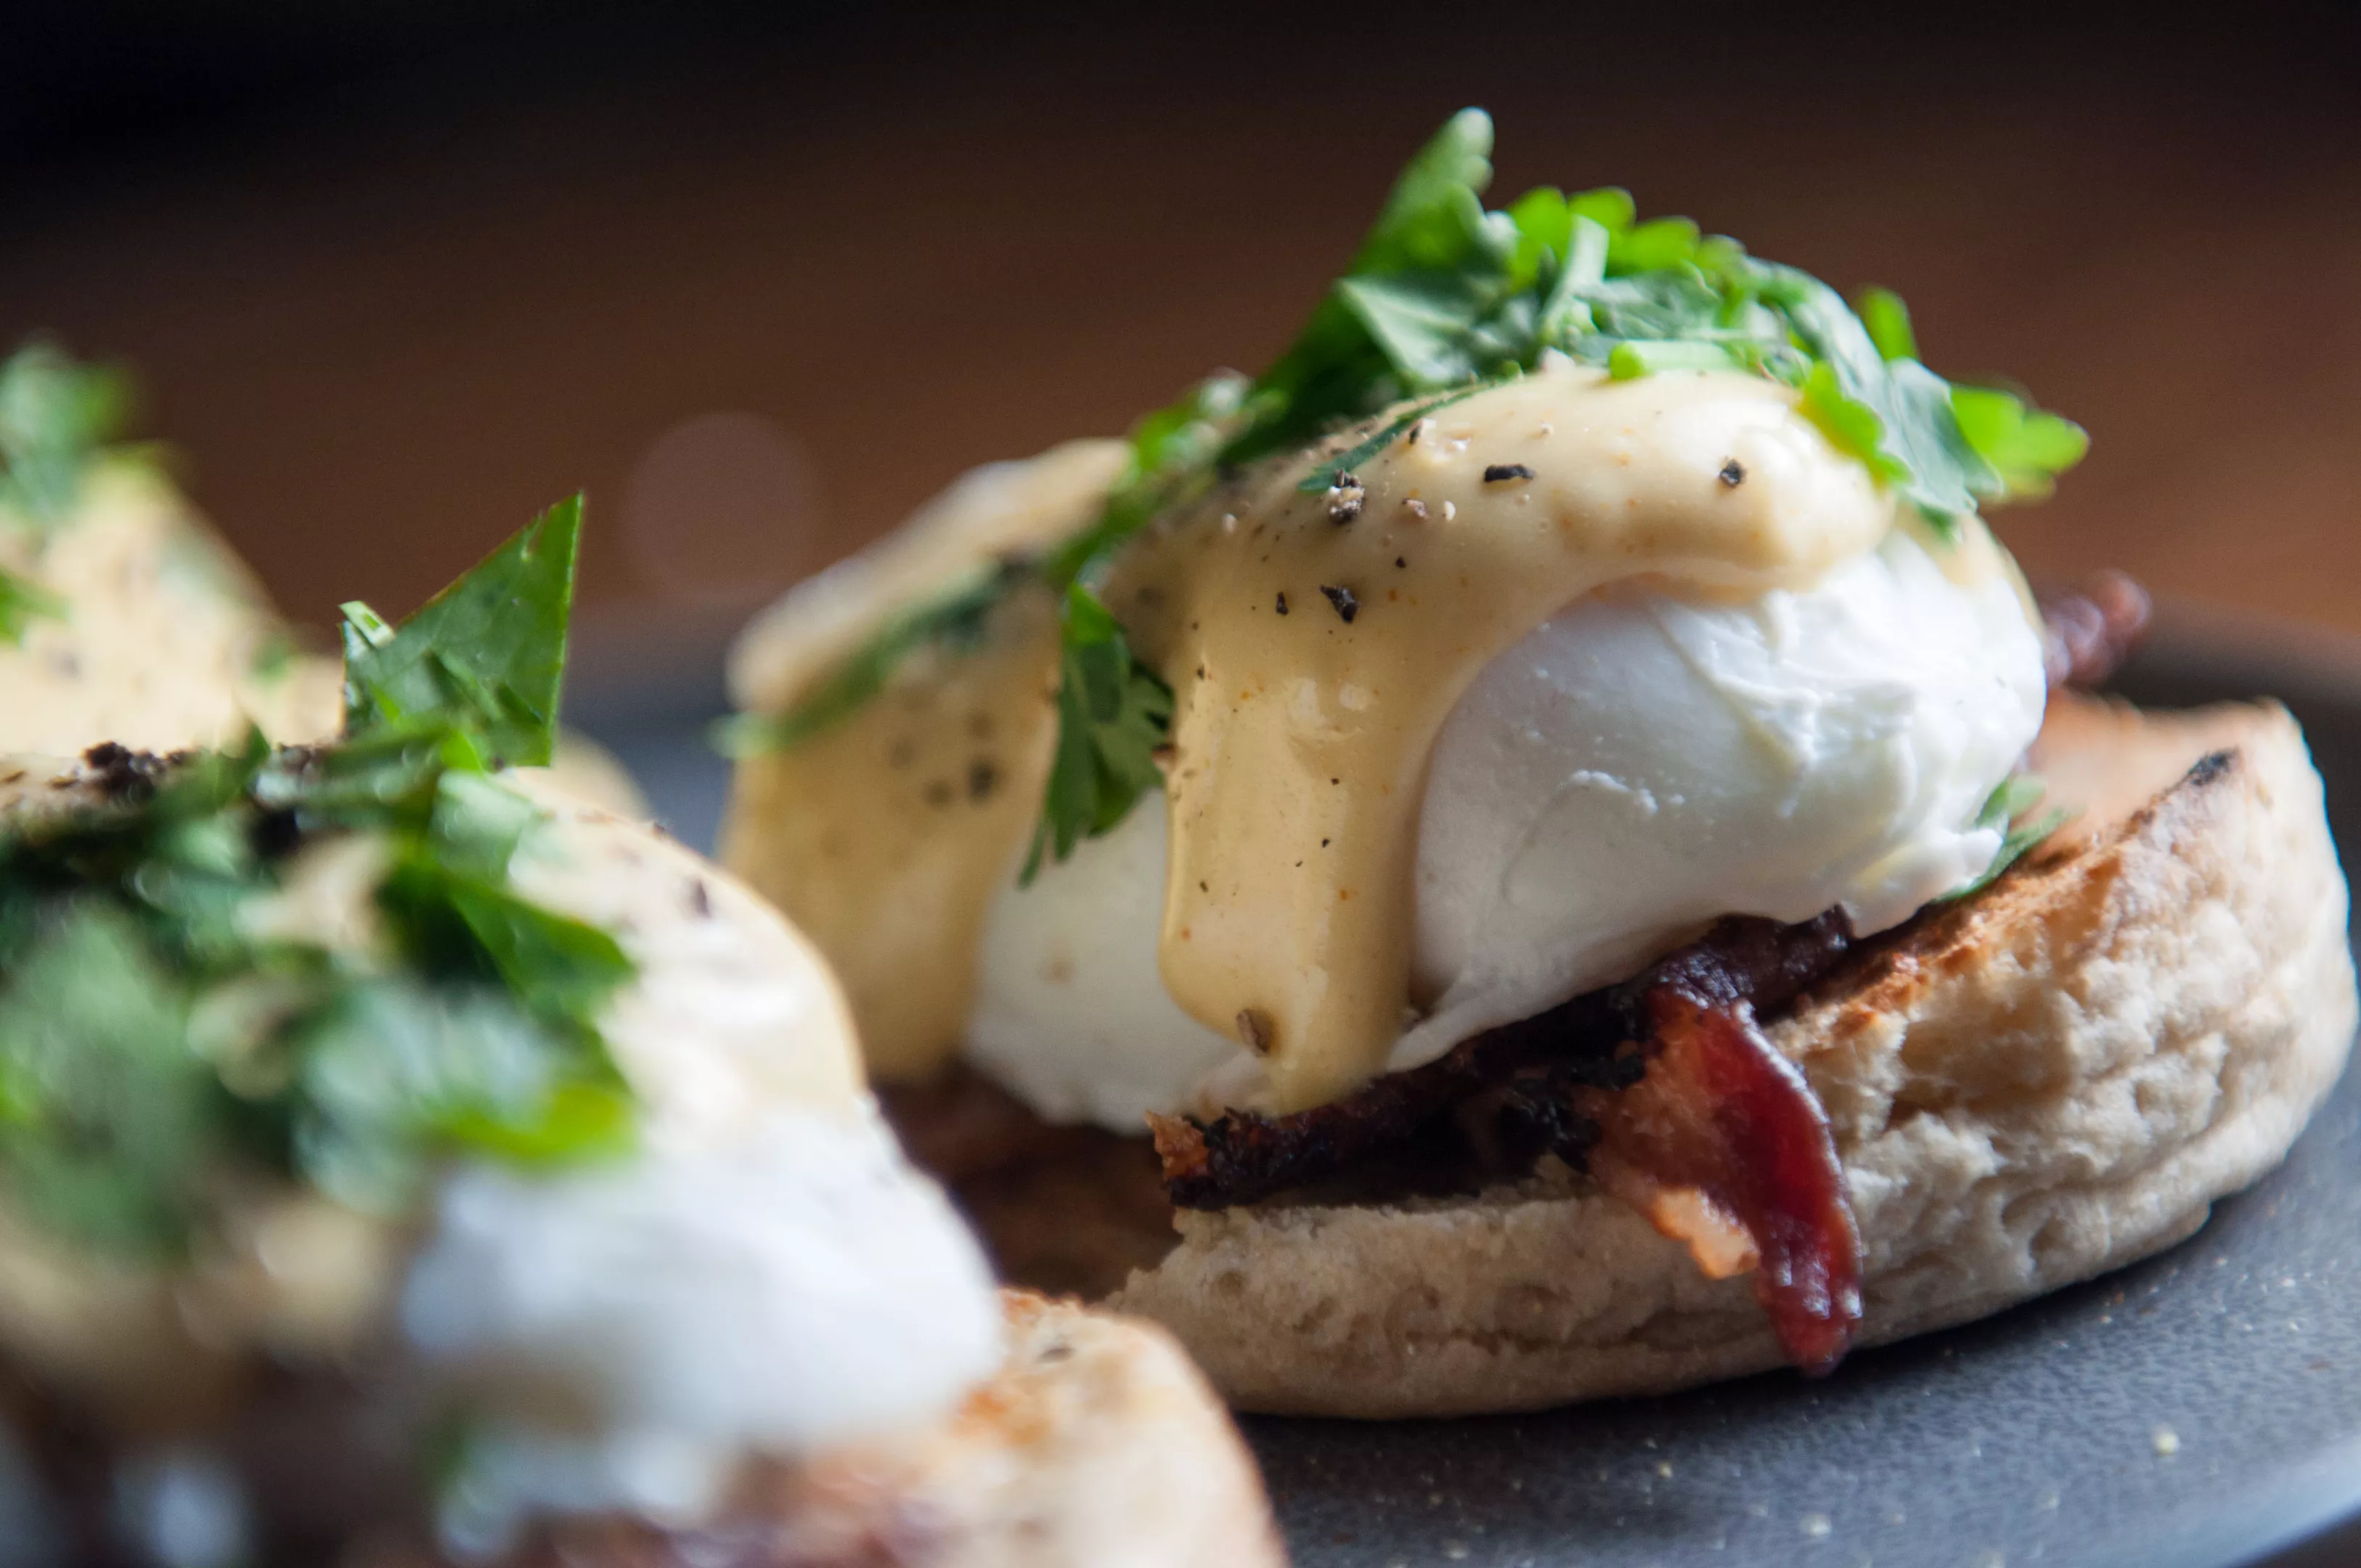
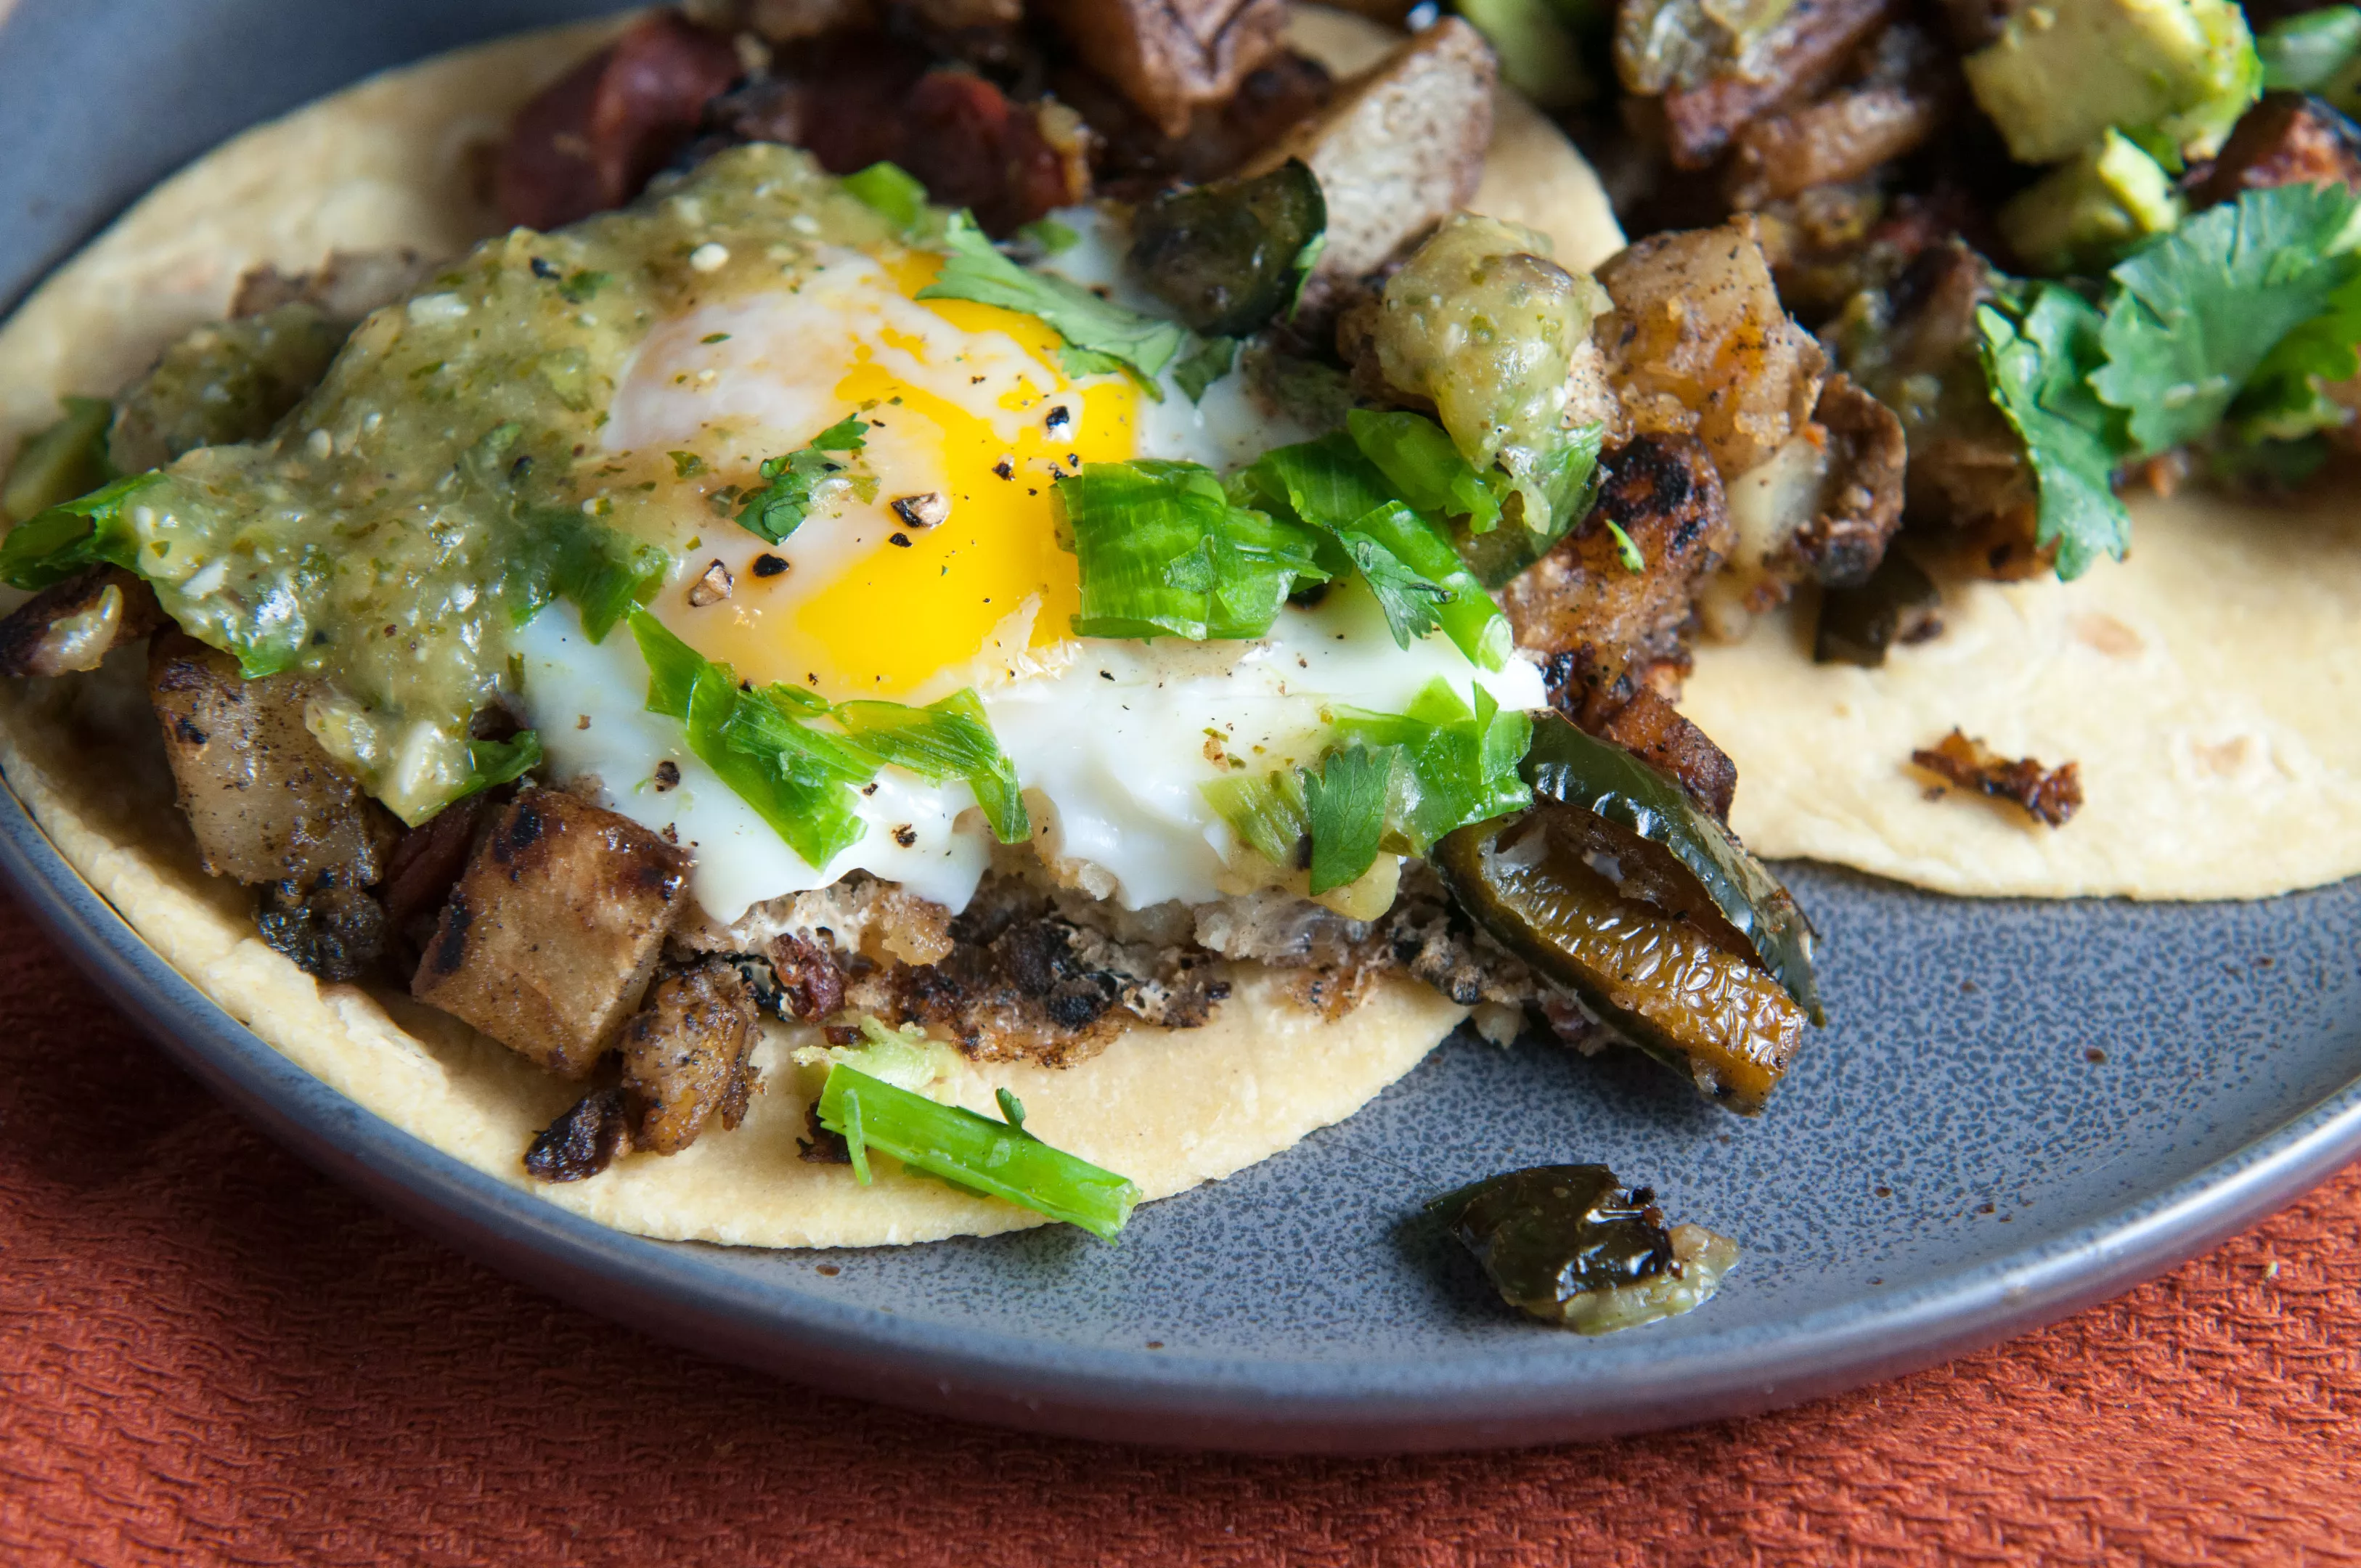
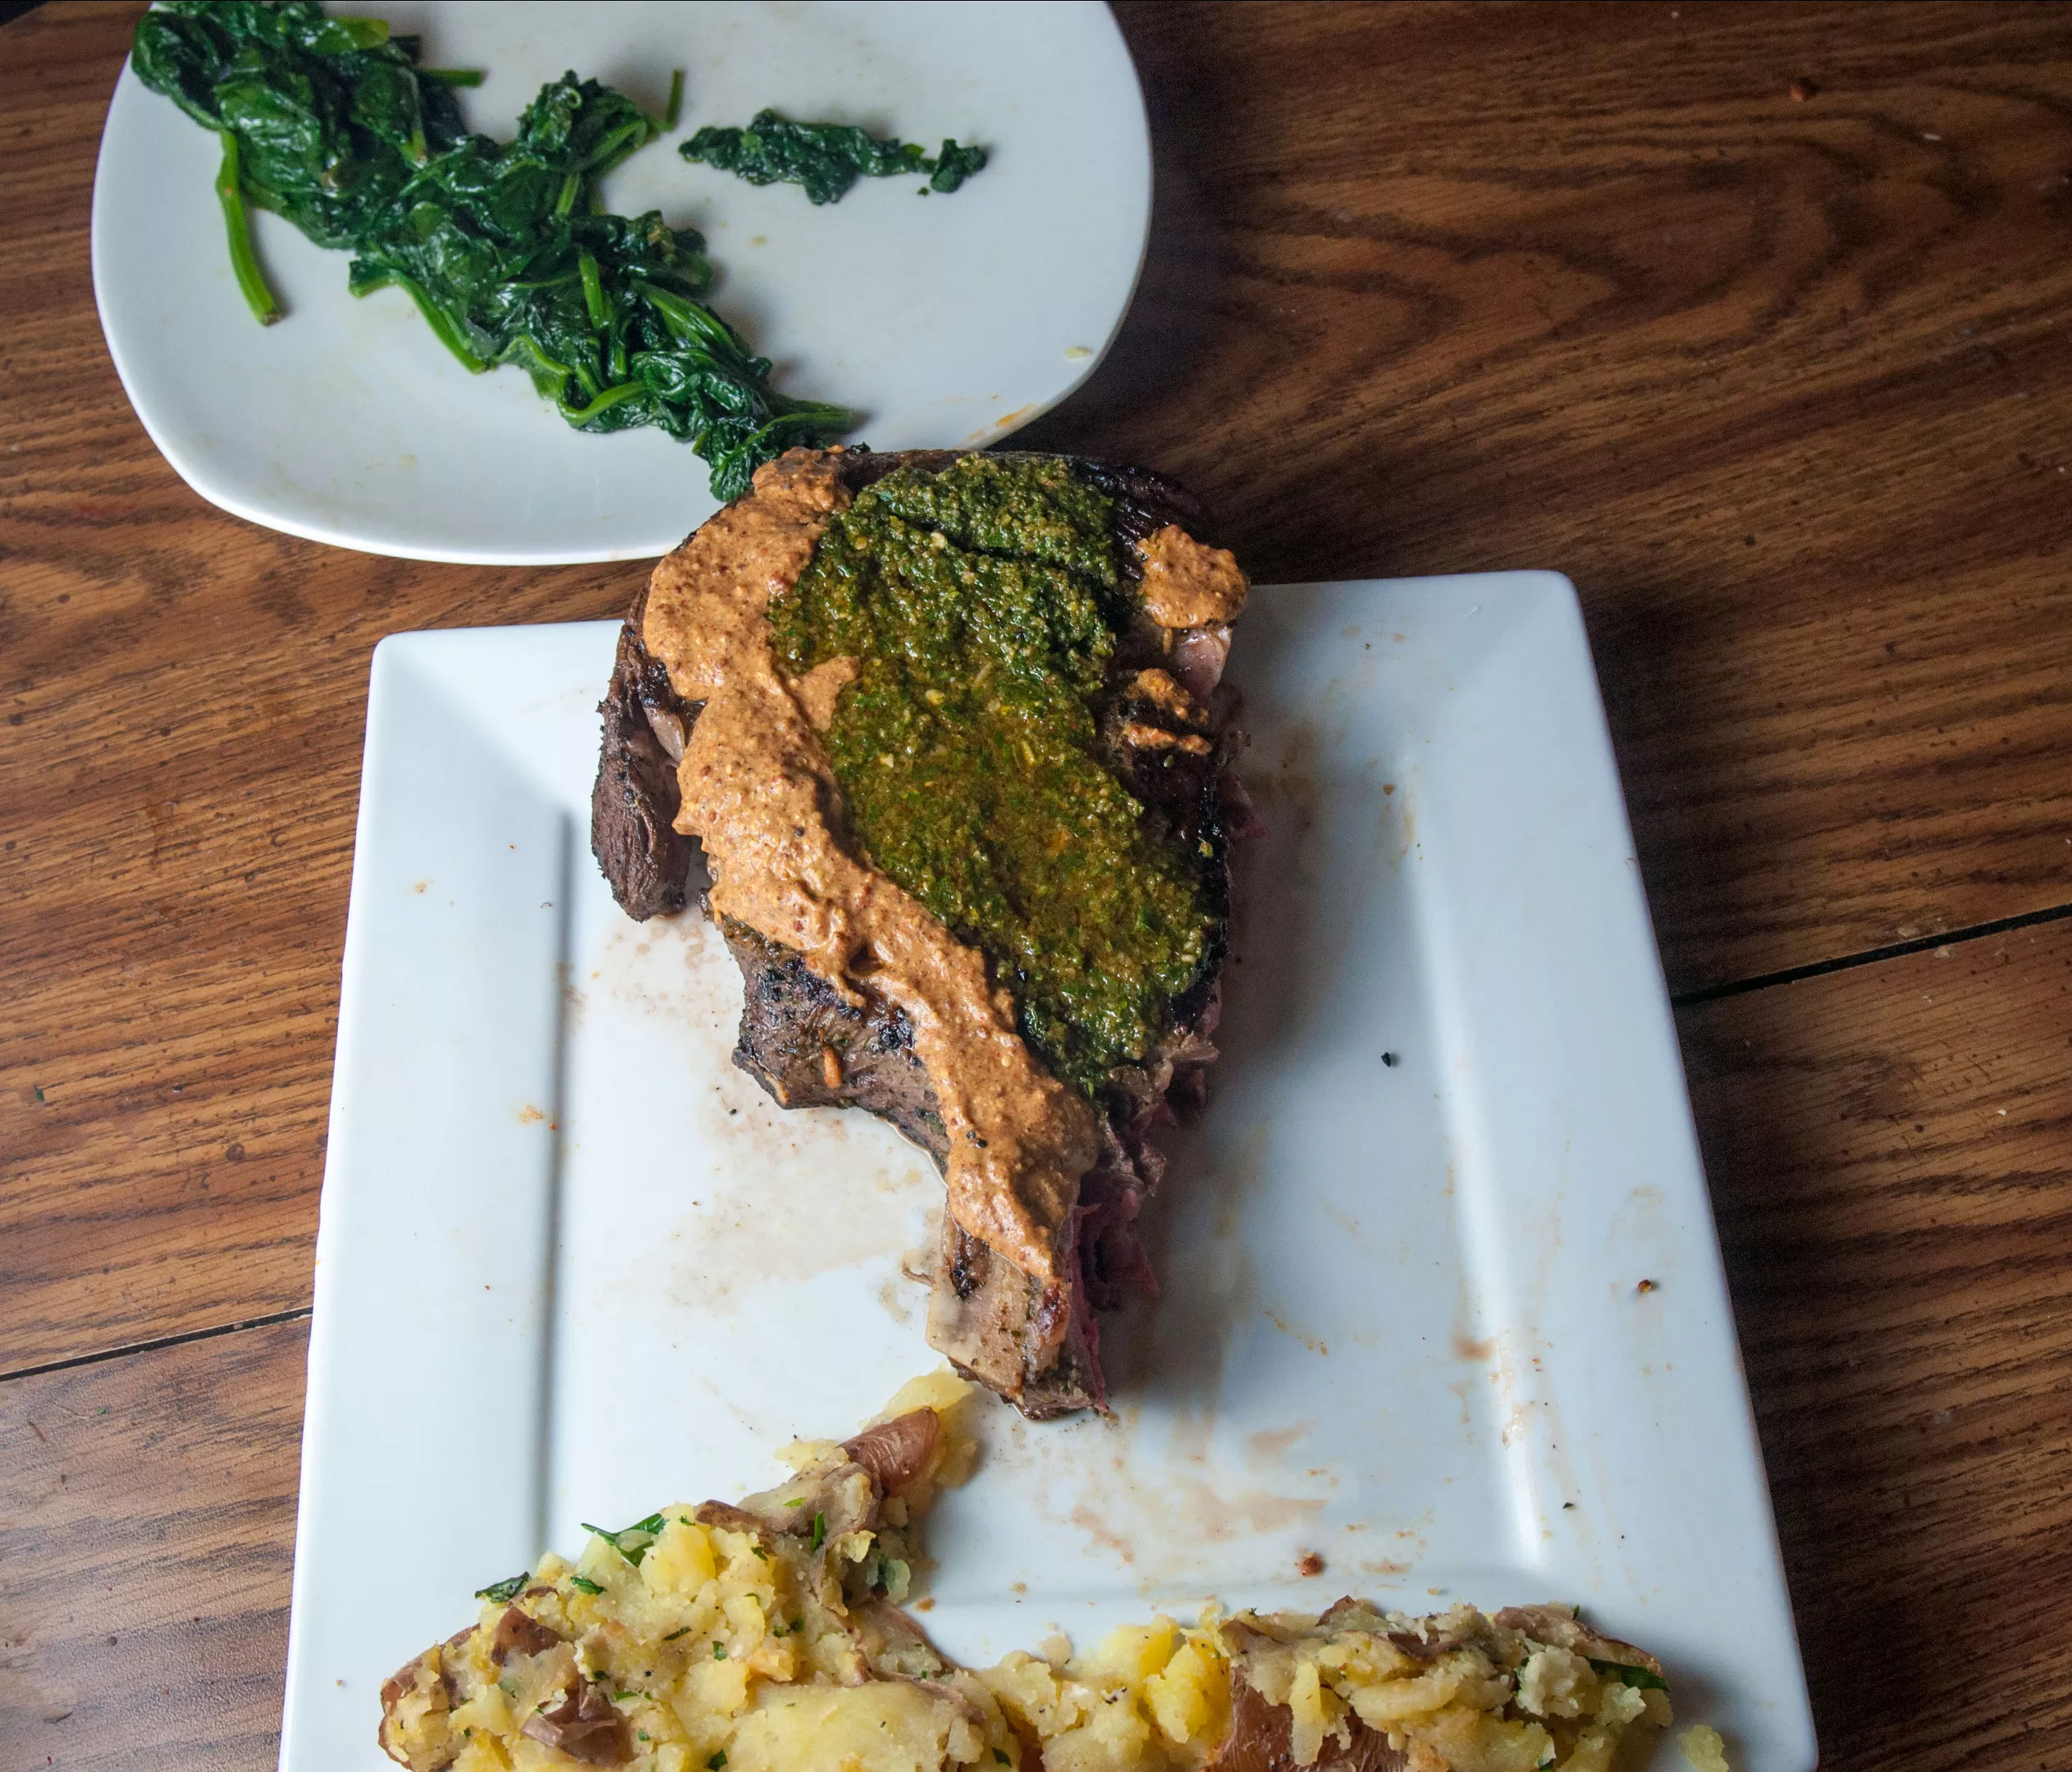
The hollandaise sauce is the star of eggs Benedict. But you don't want to just see the sauce. This is one of my favorite food photos, precisely because you can see the sauce most prominently, but also the crispiness of the bacon, the texture of the poached egg, and the lightness of garnish. (The wimpy English muffin couldn't be helped sadly.)
But if you just dump it on your dish, the sauce can obscure the most interesting parts of your food photos. Fancy restaurants will use often use little squigglies of sauce when plating, or will even put little dots or dashes of the sauce on the plate first and then set the dish on top of that.
"Let’s say you have a steak with a mushroom sauce gravy and mashed potatoes. Kwak says. "Don’t just, like, lump it all on."
Look at what professional chefs do.
"They might lay the steak hanging off the potatoes. They might just drizzle a little bit of the mushroom sauce." Kwak says. "You want to show off what’s going on,"
Place the vegetables carefully, intentionally, even stacking them.
"For me, food photography is about showing off the ingredients," Kwak says.
Back when I worked at best-burger-in-Spokane-joint Red Robin, I had to answer the phone, "Thank-you-for-calling-the-North-Point-Red-Robin-Home of the Smiling Burger." And what was a "Smiling Burger?"
Our Red Robin manager is glad you asked: A smiling burger showcases each of the burger's ingredients when you look at it from the side.
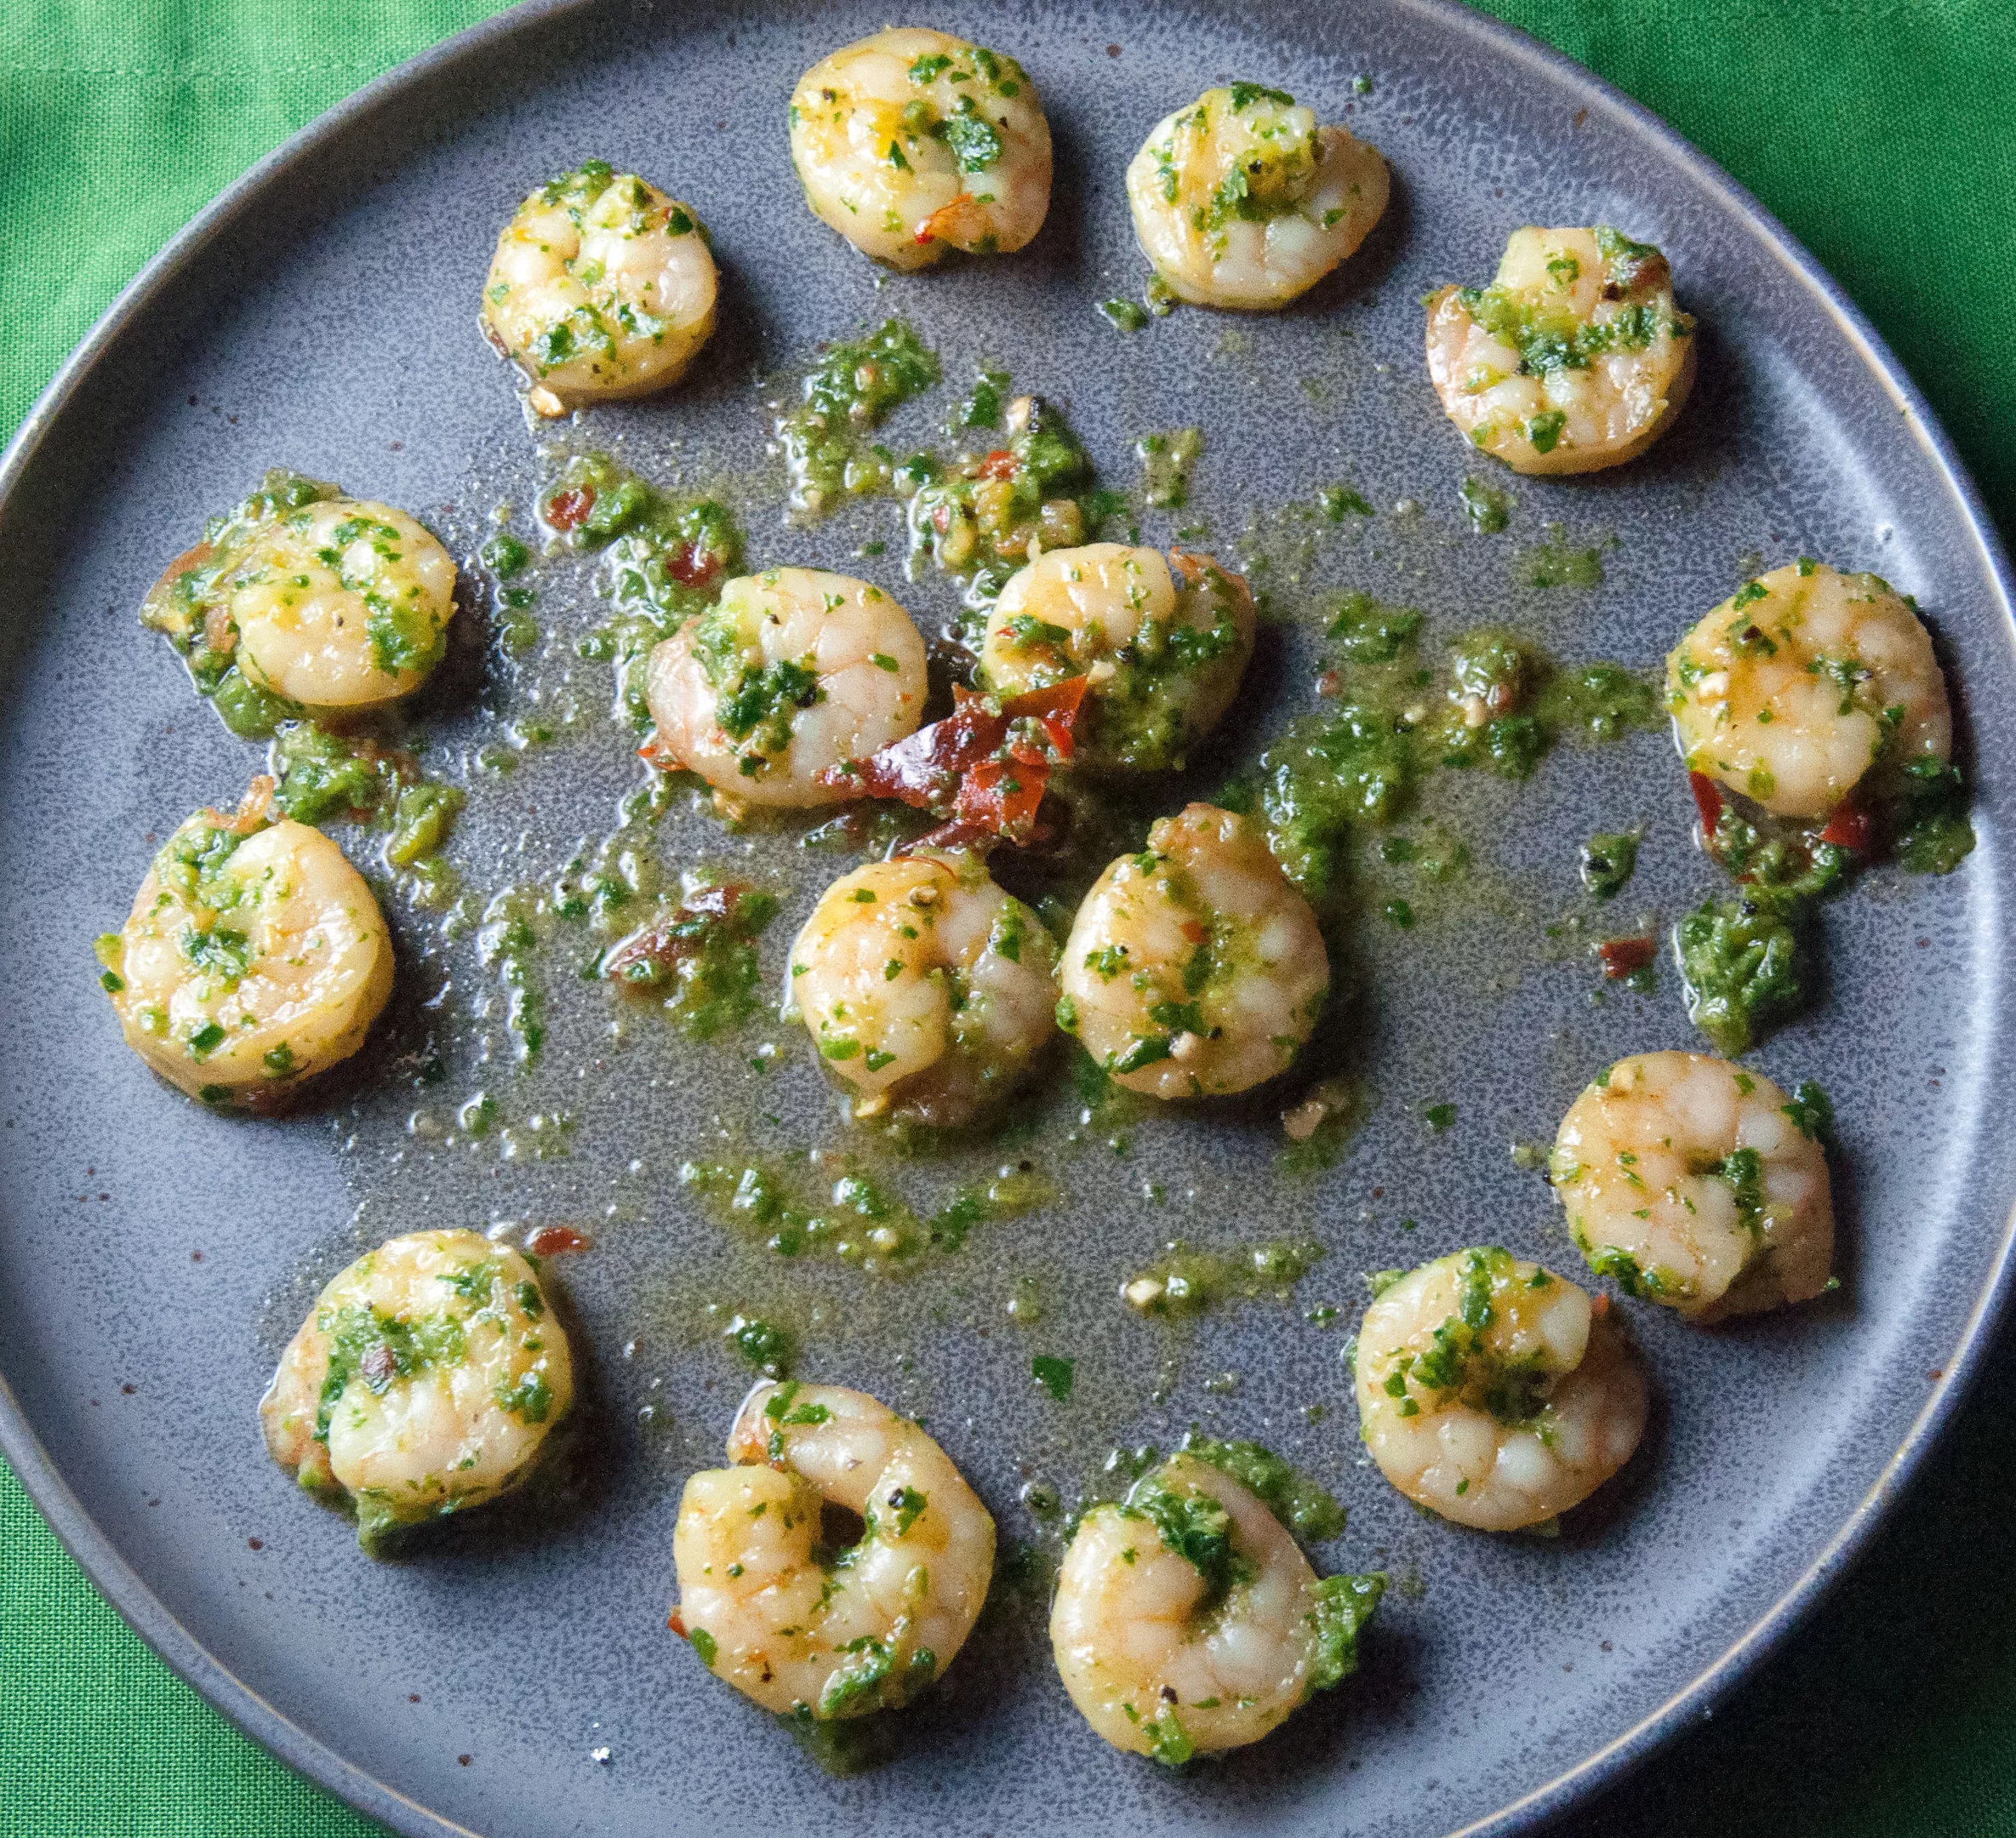
So make your ingredients distinct stars in an ensemble, not just a mishmash of extras, Kwak says. Say you have a pasta sauce: You might want to drizzle the sauce lightly on the pasta first, before manually placing ingredients you want to showcase — a bell pepper slice, a few green onion pieces, a strand of spinach, a shrimp — in the spot you want to focus on.
Don't give every ingredient equal billing either, Kwak says. Don't feel the need to cover your entire plate. Simple is often better.
Don't dump. Curate.
Accessorize
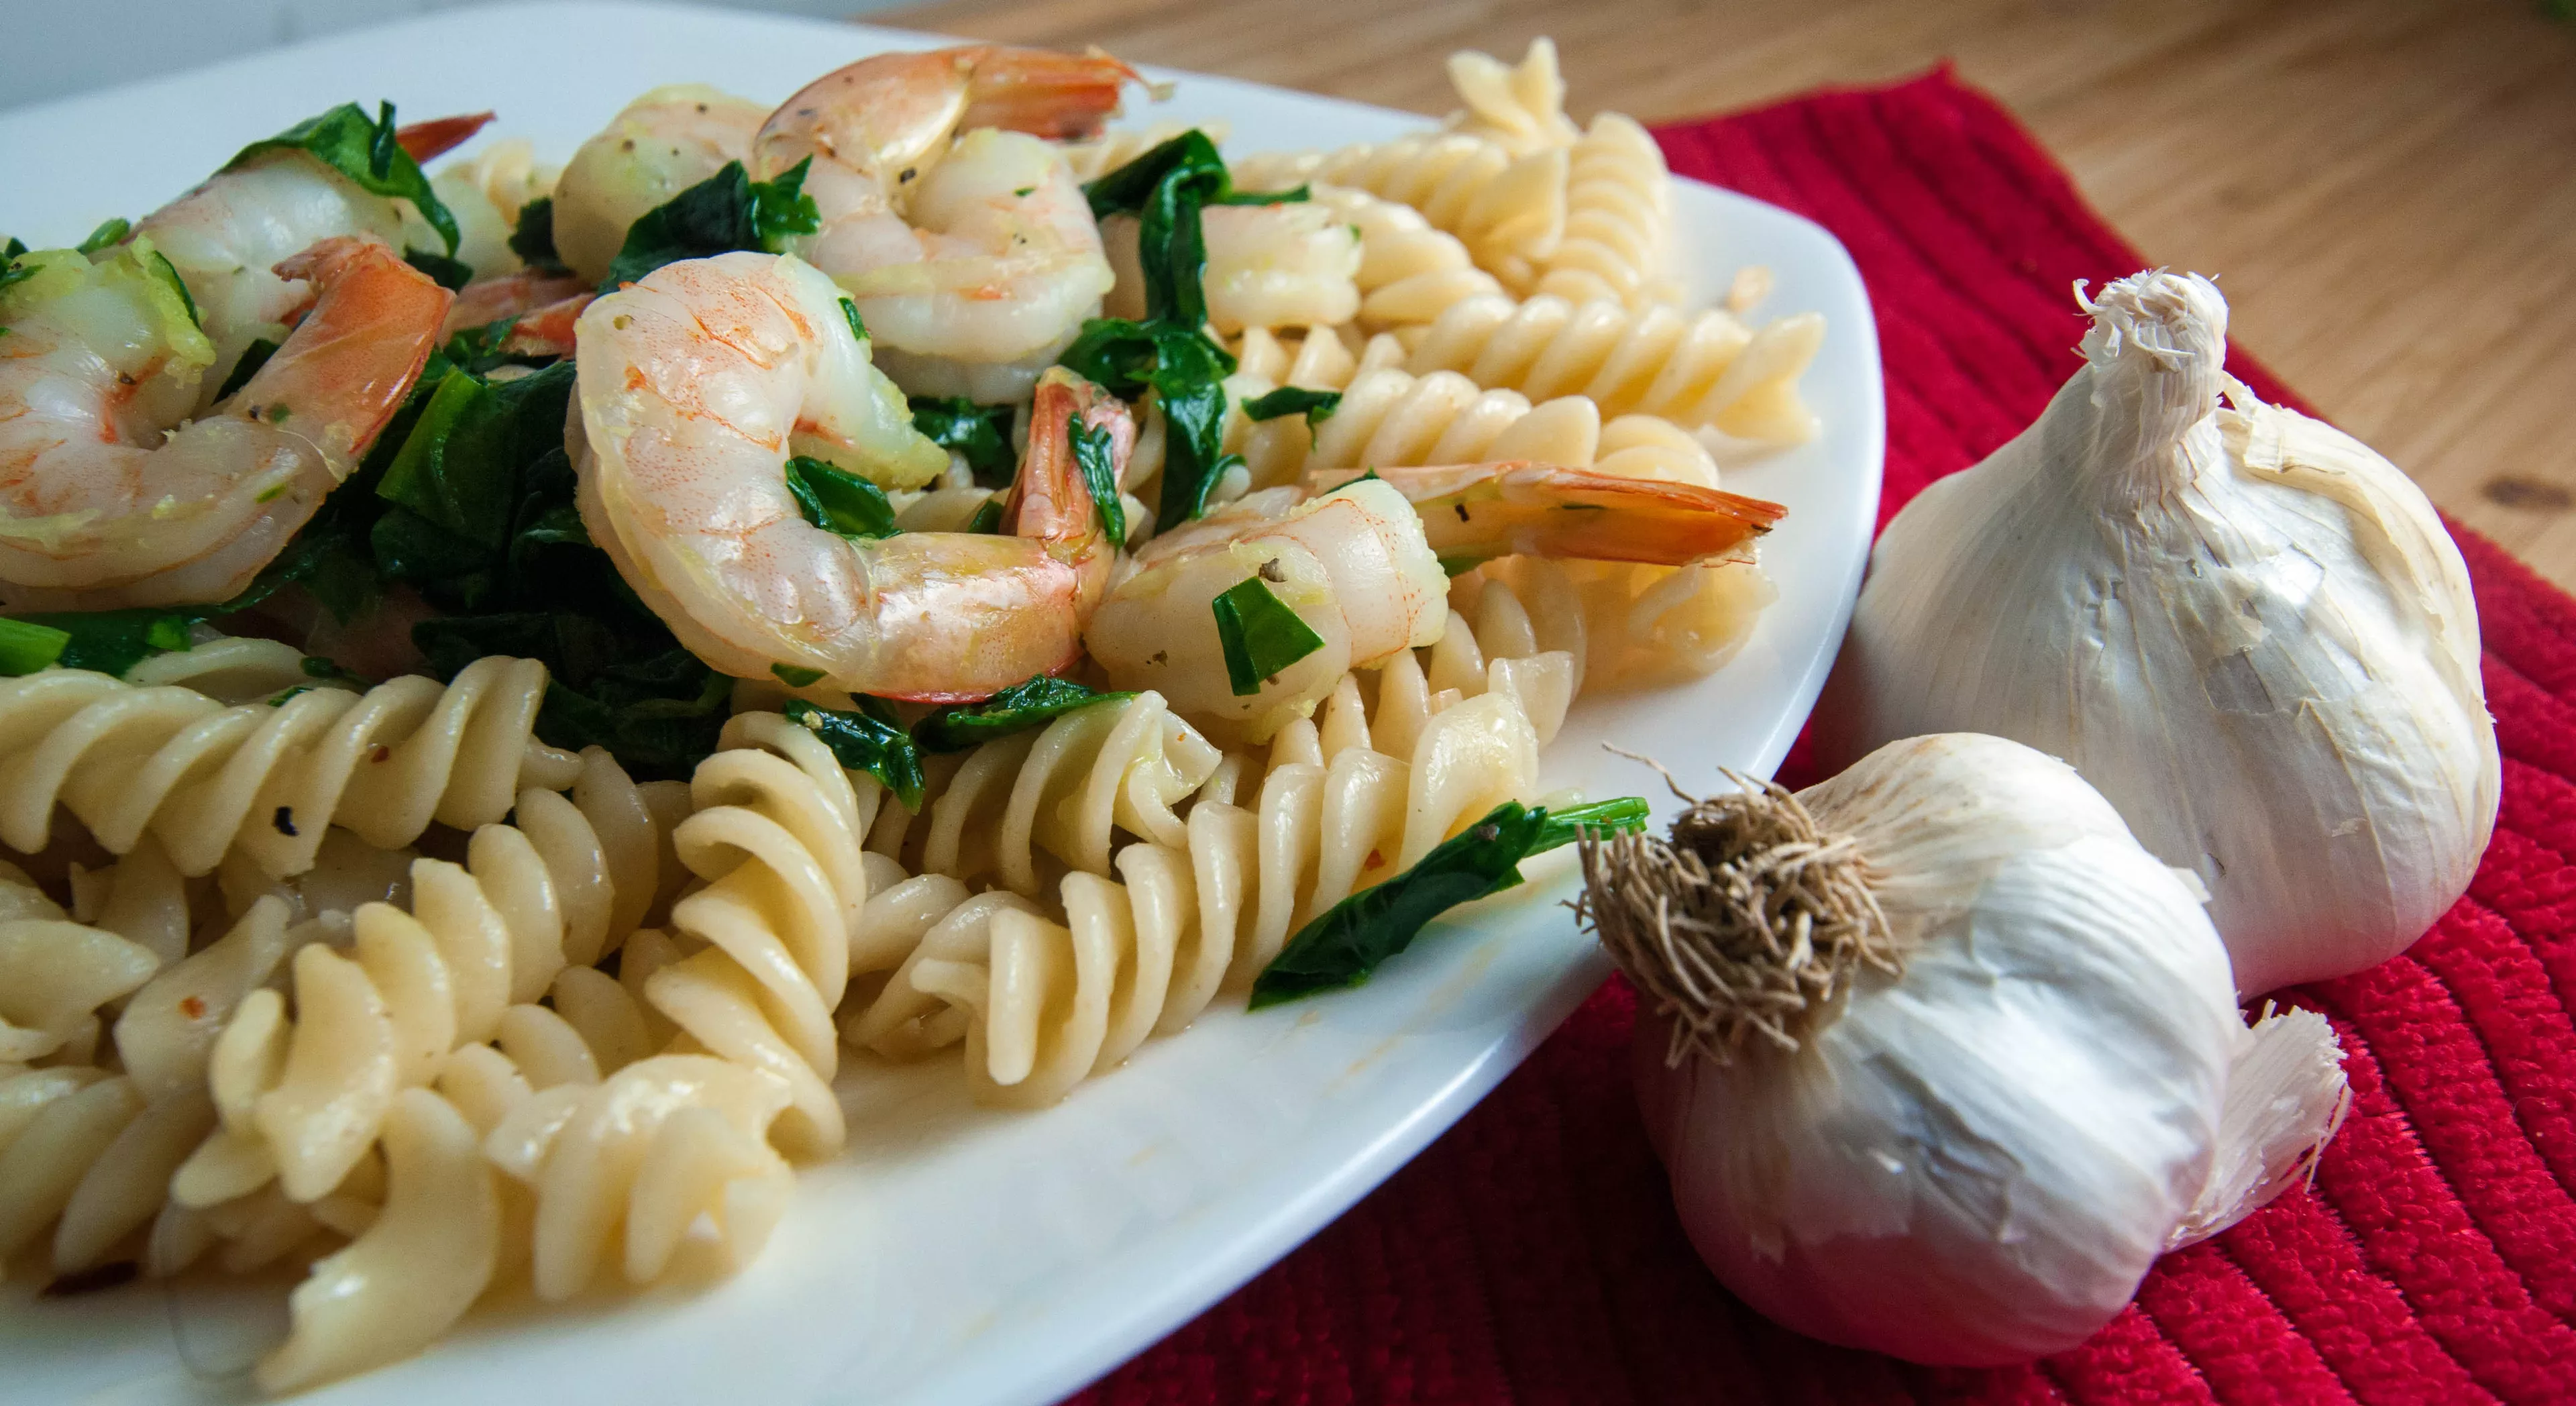
When you have three types of garlic in your pasta, how do you show that in a photo? Simple: By placing a head of garlic on the side or in the background.
I did something similar with a when I put together braised Ras El Hanout lamb shanks with dried figs: It's tough to communicate "dry figs" in a photo, so I added a fresh fig to show what I'm talking about. In professional publications, like Cooking Light, you'll see similar techniques: A lemon in the background of a fish dish, for example.
Similarly, change up your backgrounds. Buy an eclectic mix of dishes at a thrift store. Purchase a selection of differently colored cloth napkins. They should never be the focus, but they can add some much-needed variety to the palate of your plates.
Play with your food
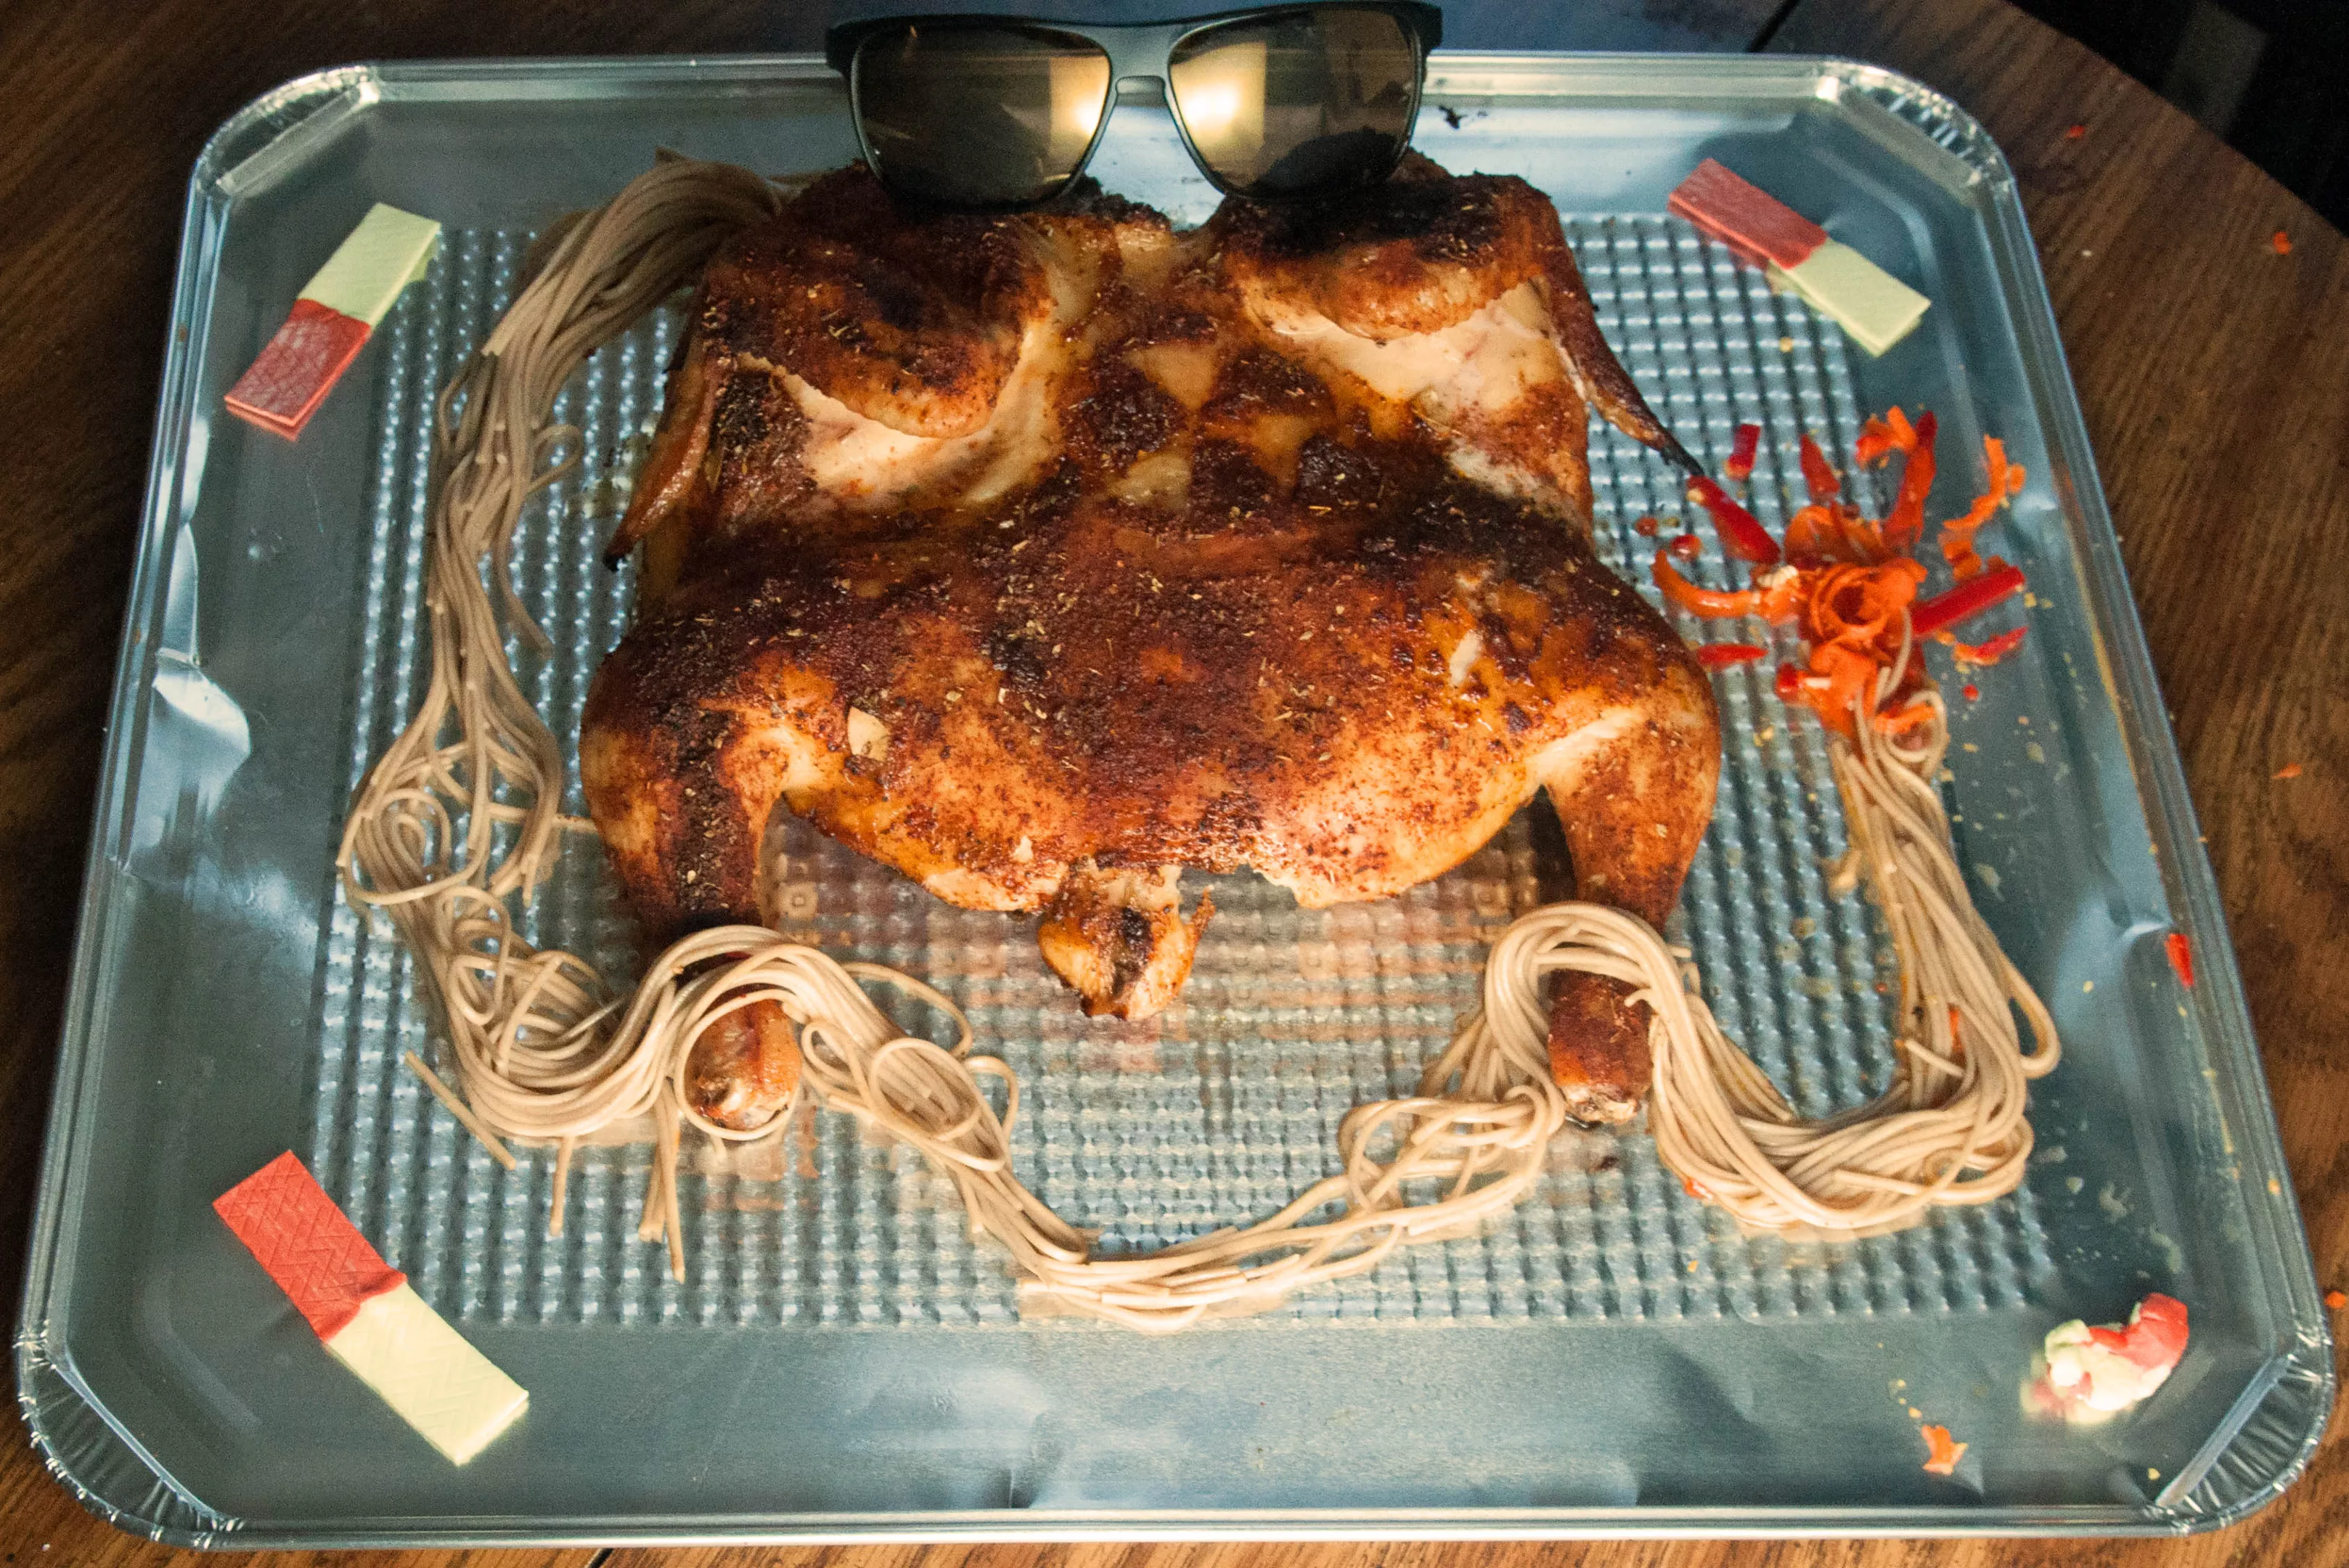
Don't just go for beauty on your Instagram feed. That gets irritating after a while. Instead, go for silly.
When my dad and I were going to see the latest Tom Cruise movie earlier this year, I decided to make "Chicken Impossible: Fallout." A great photo? No. But it's a lot more fun than yet another boring pasta dish.
Improvise.
I was in the middle of making a South American-style steak chimichurri dish when I realized that the cut of steak I was about ready to sear looked a lot like the continent of South America. So I went with it: turned the
Adding a little bit of an extra visual challenge can make the drudgery of cooking a lot more fun.
Mix it up with your photography too.
"Experiment, experiment," Kwak says.
Don't get discouraged by a failed photo, he says. But also don't get too smug about a photo that you think is really cool. There's always the next picture.
"A lot of people get really attached to a photo they took," Kwak says. "And I wouldn’t do that. I would treat every photo as a step you take when you’re walking."