This inexpensive, simple DIY is great for beginners who want to add more lighting to their outdoor space without breaking the bank. Health & Home Art Director Ali Blackwood tackled this project in just a few hours — not counting the time it took for the cement to set.
IMPORTANT NOTE: When choosing a planter, It's important to get one that has a wide, flat base so it's not prone to tipping. Make sure to fill it only halfway with cement, leaving room for the soil and plants.
Materials:
- Pressure treated 4x4 fencepost
- Fast setting concrete mix
- Hanging plant brackets
- Medium-large planter pot (Plastic or wood)
- Plastic sheeting
- Potting soil
- Flowers
- Outdoor string lights
- Tools:
- Drill
- Level
- Masking tape
- Trowel
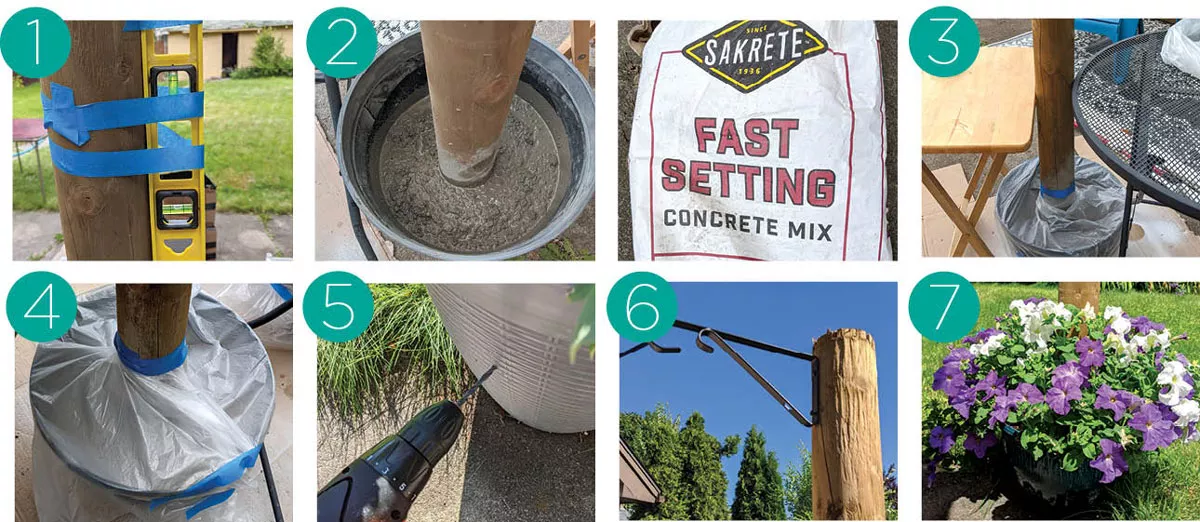
- Tape the level to the side of your fencepost, and hold the post in place, centered in the planter.
- According to the directions, add the cement and required water to the planter, while holding the fencepost steady (this is a two person job). We used one bag of cement per planter — and it filled up about halfway. Use your trowel to mix the cement as you go, if needed.
- Brace the fencepost so that it stays level while the cement sets. We braced ours up with tables to hold them in place.
- Cover the planter with plastic and tape securely — this keeps the top from drying out too quickly so that the cement will set evenly.
- When the cement is set, drill holes around the side of the pot, just above the cement line. These holes will allow drainage for the plants.
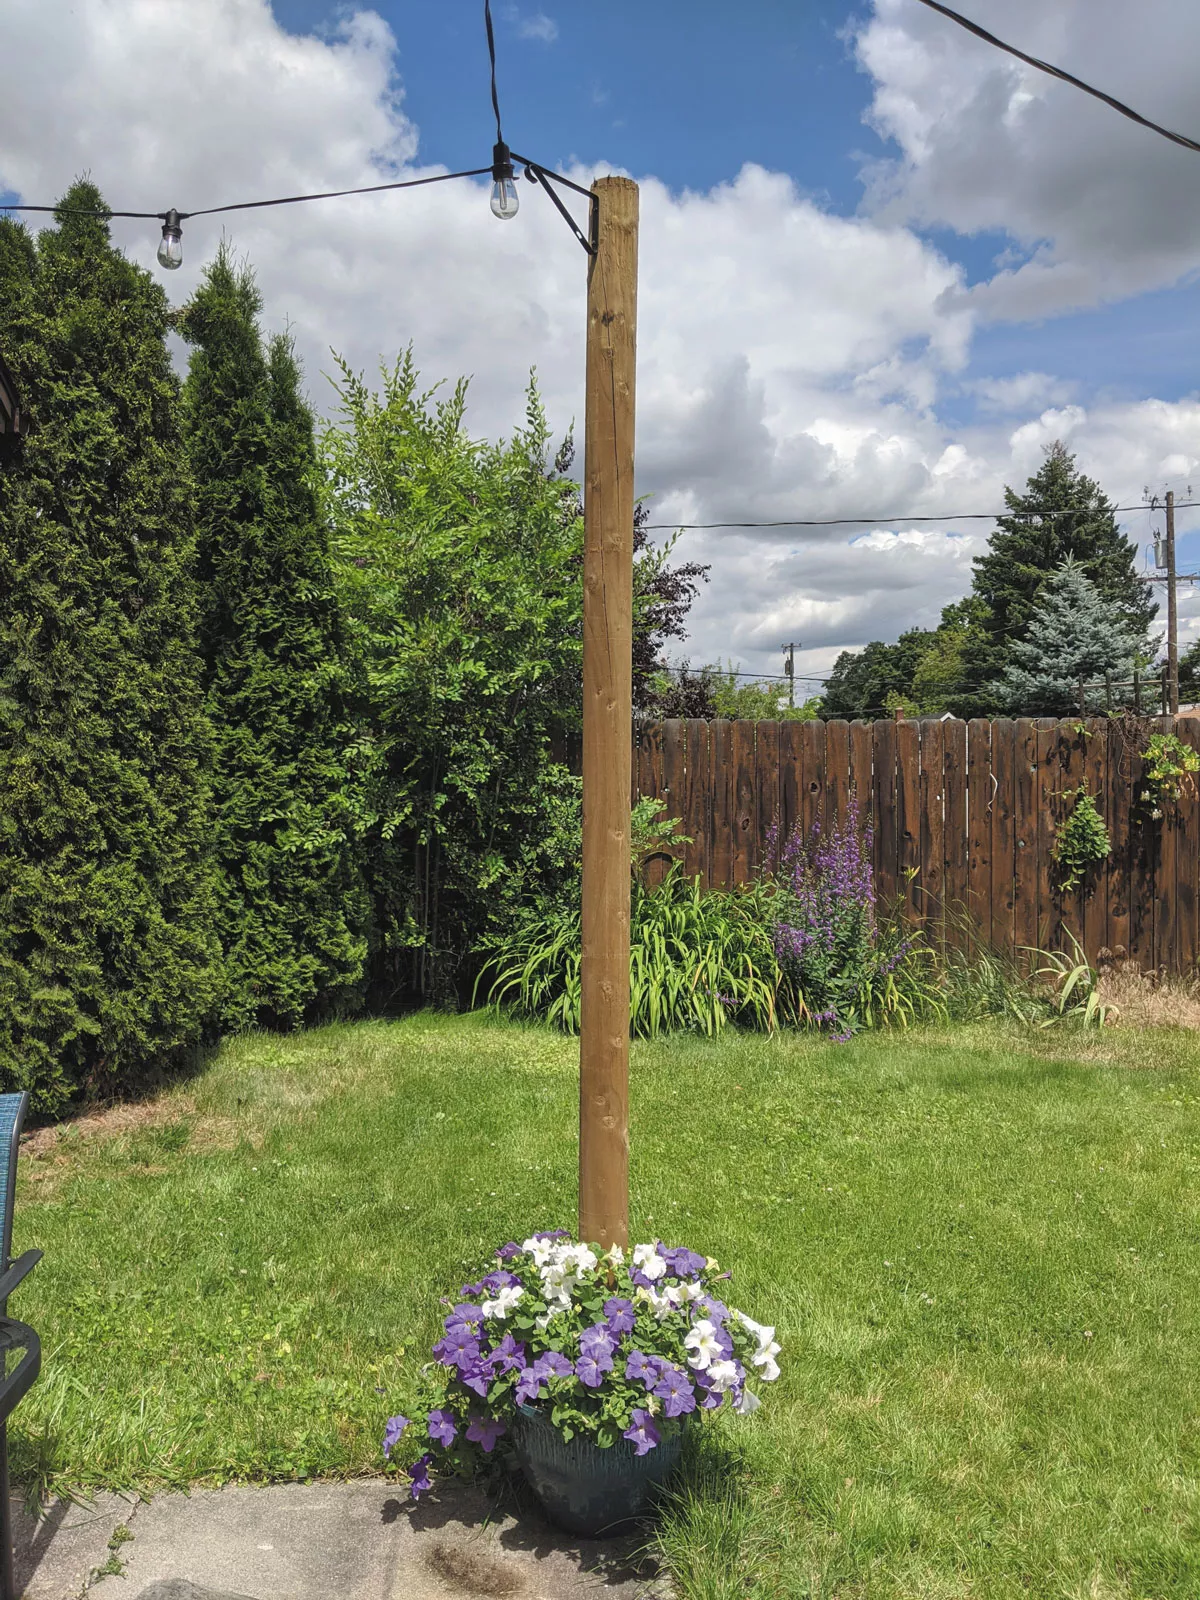
- Lay down on its side, and attach the plant brackets or hooks to the fencepost. Stand back up.
- Fill the rest of the planter up with soil, and add plants — we used petunias.